Monthly Archives: November 2011

Upgraded

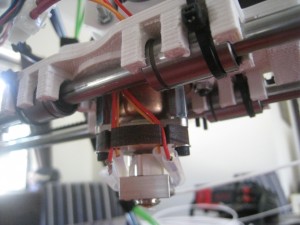
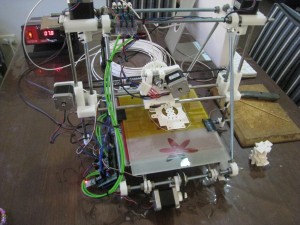
One of the most amazing things about the Reprap project is that the printers can print out their own repair parts and upgrades. Today, my printer joined that club when I installed the linear bearing upgrades that the printer had printed off itself.

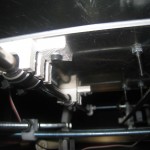
The installation process went fairly easily, with the main hassle trying to line up the Y-axis bearings with each other. The best way to achieve this was by only screwing in one of the two screws in each mount, leaving the mount free to orientate itself along the smooth rod.

It was a little bit noisy at first, being metal-on-metal, but a bit of lithium grease on the rods quickly fixed that up.

Main things to work on now:

  • Ooze settings.
  • Solid infill, particularly on ‘top’ layers.
  • SD card printing
  • Investigate the ‘Marlin’ firmware (as per this thread)

Linear Bearings

I’ve been having trouble printing out the parts to use the linear bearings on the Y-axis. The bases have been coming through fine, but the ‘towers’ have been coming through as blobby messes. Lowering the temperature a bit has helped.

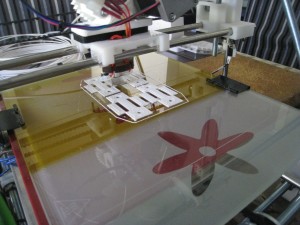
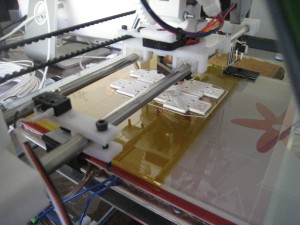
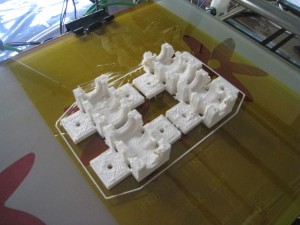
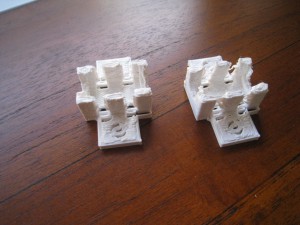
Following on from Julian’s suggestion, I had a look at the Easyfit software he recommended. Using it, I cloned the Y-axis bearing holder three times, so that I had four of the parts on a ‘plate’. My thinking was that by printing four parts, it would give the parts enough time to cool down between each layer. I set them up with 5mm between each piece, which worked great.

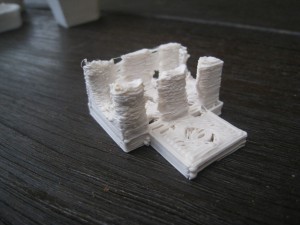
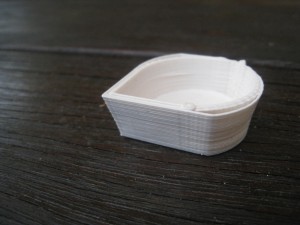
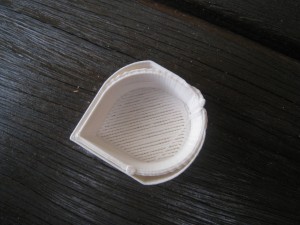
This was my longest print so far, at 57 minutes. This is how the parts looked when printing was finished.

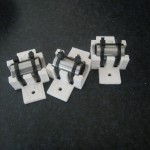
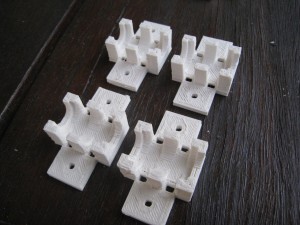
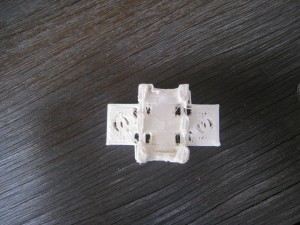
 As you can see, I still need to work on my ooze settings, but the parts looked pretty good, with no melting around the ‘towers’. My theory worked well. Here’s the parts once cleaned up a bit with a Stanley knife.

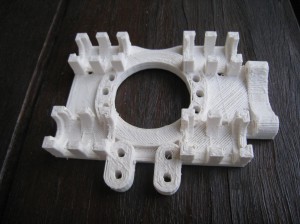
I’m really pleased with them, and the linear bearings snap into them without any troubles at all. Next up was to print up an X-Carriage. The main option is Greg Frost’s X-carriage, but I went for Joem’s version, as it allows for four, not three, bearings. However, it’s very large. If it cuts down on the X-travel too much, I might have to switch to the three-bearing version. I also printed out the version with mounting points for a fan, which I think I’ll fit in the future.

This was an even longer print, at about an hour twenty. This print had some noticeable lifting off at one corner, which came up about 1mm. This won’t affect the performance of the part, but I might have to keep the bed temperature a bit higher than 100 degrees for these larger pieces in the future.

Useful Printing

With the ‘backlash from hell’ problem solved the printer’s printing really well, enough that you can actually print useful things with it.

I’ve been experimenting with temperatures a bit, trying to find a happy medium that will print well, and still stick to the heated bed. I’ve found some settings that work quite well.

To start with, I set the heated bed temperature to 130 degrees. This results in about a 115 degree temperature at the top of the pyrex sheet. I also set the hot-end to 230 degrees. Once the first layer is complete, I turn down the hot-end to 220, and the bed to 100, which results in about a 90 degree top temperature.

These settings work great. The first layer sticks really well, and the object stays really stuck for the remainder of the print. Once the print’s finished, the bed temperature usually has to drop below 60 degrees before the object can be removed without major force. The base has that nice ‘glossy shine’

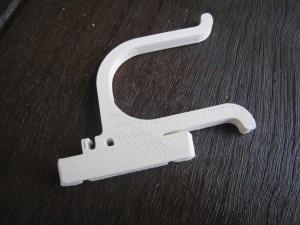
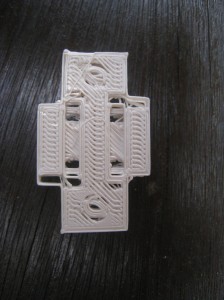
The first objects on my list of ‘real prints’ are some LM8UU Linear bearing parts to put onto the printer, and a spool holder for the filament. Here’s the first spool part:

Learn From My Fail

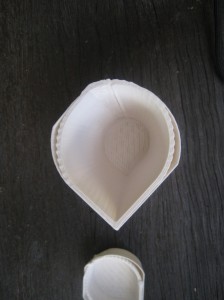
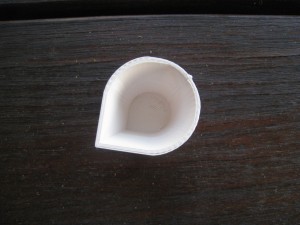
If you’ve been following the blog, you’ll have seen that I recently replaced the pulleys with aluminium pulleys. I’ve also been having trouble with my shells not lining up. Until yesterday, I hadn’t put two and two together, and realise that one was causing the other.

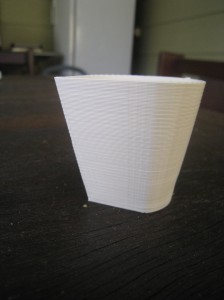
I put a post on the Reprap Skeinforge forum, showing the shot glass, and asking what might the problem be. I thought it must have been an SF issue, but the forumer’s quickly suggested that the problem was probably with backlash.

Nophead then suggested that the problem was probably the aluminium pulleys. He stated that the teeth on the pulleys are too narrow, and cause the belt to slop around on the teeth. So I pulled the Aluminium pulleys off, and replaced them with the original RP pulleys.

What a difference. So, learn from my fail, the ebay Aluminium pulleys are worthless. Video of the shot glass being printed:

Slowdown

As I mentioned in my previous post, I had issues with the last print due to the high speed. I thought I’d slow this one down.

I also thought that I should be more meticulous about keeping records of the changes I’m making. In keeping with the original ‘lab notebook’ idea for this blog, here’s the settings.

Original settings:

From ‘Speed’

  • Main Feed Rate – 60 mm/s
  • Perimeter Feed Rate – 30 mm/s
  • Travel Feed Rate – 130 mm/s
From ‘Raft’
  • First Layer Main Feed Rate – 35 mm/s
  • First Layer Perimeter Feed Rate – 25 mm/s


Changed Settings:

From ‘Speed’

  • Main Feed Rate – 20 mm/s
  • Perimeter Feed Rate – 15 mm/s
  • Travel Feed Rate – 30 mm/s
From ‘Raft’
  • First Layer Main Feed Rate – 15 mm/s
  • First Layer Perimeter Feed Rate – 15 mm/s

And the result:

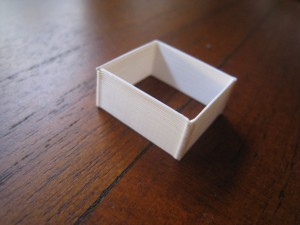
As you can see, it came out looking nearly identical to the first part. So it looks like speed isn’t the problem. As another test, I decided to print out the ‘single wall calibration piece’. It came out beautifully.

Then I thought I’d try the 10x40mm piece. I stopped that one after about 8mm, it was just turning into a sludgy mess. I thought then that to print a piece like that, I’d need to turn down the temperature, or use active cooling. I thought I’d try turning the temp down.

To get a better picture of what was happening, I thought I’d print out the ‘ultimate calibration piece’. To start with, I turned the temp down to 225 degrees, (from 230).

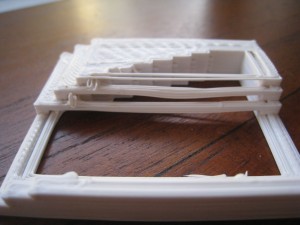
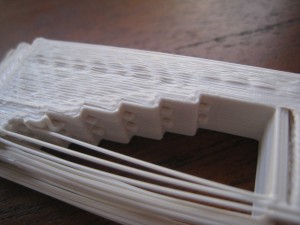
You can see in the picture, that the first couple of ‘hanging beams’ are sagging a bit. I then turned the temp down to 220. The remainder of the object printed fine, but the sagging was noticeably reduced.

I stopped the print at that point, since the ‘shelling’ problem (can be seen in the problem above) was distracting me. It’s clearly seen in the ‘reprap shot glass’, and it looks like SF is not correctly shelling the object, and creating proper G-Codes. I thought I’d better fix that problem first, before messing with the temperature.

Overthinking the Problem

One of the things I try and teach younger engineers (whenever they’ll listen – damn Gen Y’ers) is that it’s possible to over-think a problem. You end up burrowing down so much that you become entangled in the work, and generally end up with a much more complicated solution than what’s actually required.

When thinking about changes that I had to make to skeinforge, I realised that I had too many variables – one of the classic symptoms of over-thinking. I had made too many changes to the original settings, and I wasn’t sure which ones I needed to change back, or other ones to change.

So I decided to take a step back, approach the problem from the start again. To do that, I deleted the skeinforge directory, and re-installed from latest download – going back to the original skeinforge settings, no adjustment at all. This would allow me to approach the problem fresh. I went back and re-did the shot glass.

 It’s looking great. Still a bit strange, but vertically, it’s just about perfect.

Emboldened by this success, I thought that I’d try and print out a useful part – a LM8UU Y-axis bearing holder. After looking at the options on Thingiverse, I finally settled for Digifab’s design.

Classic overspeed melted mess. That makes sense. When I did the shot glass, it was at original SF speed, up to 60mm / s. That was clearly way to fast for such a small piece as this. I’ll try it again tonight, but at a much slower speed.

The heatbed is working great. No problems at all getting the prints to stick.


J-Head Hot End

After my meltdown, I bought two hot-ends. One was the Budasnozzle, with which I’m currently printing. The other, which just arrived yesterday, is the J-head Mk 3-B, which I bought from hotends.com.

Since I’m very happy with the Budasnozzle, I won’t bother using this one at the moment. I’ll just put it in the drawer as a spare part, or to provide it to a fellow Aussie who gets in distress with his printer.

Back to Printing

This afternoon, I re-assembled the printer. The differences are the Budasnozzle, and the stepper motors with their flats and pulleys.The Budasnozzle’s attachment really makes it easy to attach. Full marks for the designer.

My only problem with getting the printer running was that the hot-end was not warming up. A quick going-over with the multimeter showed a bad connection in going to the nozzle, which was quickly fixed up.

To print, I thought that I’d try the shot glass again, to give me a good idea of the differences between the old set up and new.

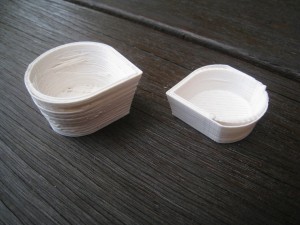
As you can see from the photos, the backlash is all but gone. The aluminium pulleys really make a massive difference here.

As I can see it, there’s three problems now.

Problem 1. Flat side on the print.

Solution 1. I suspect that the wires going to the hot-end are too tight (the Budasnozzle’s lines are shorter than the Arcol’s). Check tightness, and loosen off if necessary.

Problem 2. Extra shell around the outside of the print.

Solution 2. Turn retraction back on.

Problem 3. Base not quite filled in enough.

Solution 3. Infill feed rate

Hopefully, those problems should have the prints looking good.

Budasnozzle

After my disastrous hot-end meltdown, I tried to order in some parts for my Arcol hot-end. Unfortunately, Laszlo was out of parts for his hot end, so I had to go looking around for other alternatives. In the end, I bought two, with one to have as a backup. One hot-end I found is still to arrive, but this one arrived a few days ago.

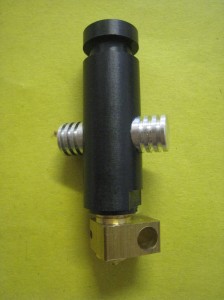
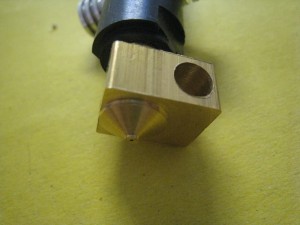
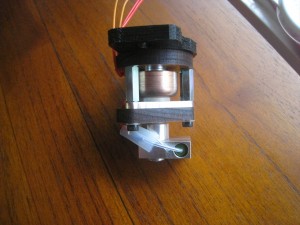
BudasnozzleIt’s the Budasnozzle, which I purchased from Lulzbot. It’s based of the Arcol design, but with some variations. It’s noticeably shorter, cutting down on the body heat-sink length, which I agree is far too long. It also uses a different type of thermistor, the slightly larger type, that looks more like a standard resistor. This type of thermistor should be much easier to replace than the ‘glass bead’ sort.

It’s very professionally built. All the parts are excellently machined, and assembled with precision, and with an eye for detail.

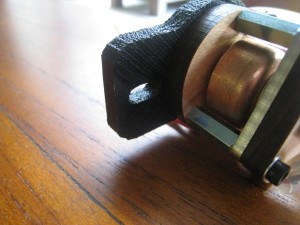
It’s best feature, however, is the attachment. As I’ve mentioned previously, the Acol hot-end has difficultly attaching with some extruders. The Budasnozzle has a printed base on it that has holes in the exact same locations as the extruders. So when you attach your extruder to the X-carriage, you’re also securing your hot-end. This also gives it a very large stable base to work from. An excellent approach that I think a lot more hot-ends should take.Budasnozzle mountI’ll put in action this weekend and get back to printing. Hopefully, it last longer than the last one did.

Offsite data backups

One of the big problems that small companies, and homes is off-site backup. Previously, I’ve done what I’m sure many people do; I have a big HD that I take to work. Once a month, I bring the big drive home, sync it with my home drive, then take it back to work and put it in the filing cabinet. I’m not concerned about anyone from work stealing the drive, or the data off it.

That’s good enough for people like myself, for whom a month’s lost data is more of an inconvenience than a disaster. But a small business needs to have a much better option. My Dad’s business is that way. It’s only a very small business, but he needs to be able to have an almost complete record of his email history. Only the loss of a few day’s data is acceptable.

The solution I originally had was to use Apple’s Time Machine backup onto an external disk. Then he was to swap the disk with one at home every month. This worked fairly well, but I kept thinking it could be done better. Make the system better, and not require him to shuffle drives.

What led me to change my thinking was Dodo‘s new unlimited broadband plans. They’re reasonably priced, and have completely unlimited data. Though they’re significantly more expensive when rural than urban, but still pretty good (only $20 / month more than my 10GB plan). My main concern with Dodo was that their network speed wouldn’t be up to scratch. Most of the time it’s excellent. It’s usually only on weekends that I notice that it’s hard to get above a couple of hundred kb/s.

So an unlimited data plan covers getting the data offsite, but where to store it? At the moment, there’s several providers who do data backup ‘to the cloud’. These are typically fairly limited in the amount of data that they can store, though prices range from good to ordinary.

The answer I came up with was network drives. A friend suggested the Drobo network drive, and after having a look at them, I thought that they would be ideal.  The DroboFS has five drive slots, so you’ve got a lot of store with good redundancy. With 2TB drives and dual redundancy (any two drives can die), you can still store about 5.5 TB of data.

Being network-enabled, they can also talk across networks. The drobo’s can be installed with a variety of software, including OpenSSH, rsync, FTP software, and a bunch of others. So I bought two of them. One to set up at the office, another at home.

So the system I’ve got now goes like this:

  • Local computer uses Time Machine to back up hourly to the network drive.
  • Local computer also uses rsync to back up daily to the network drive.
  • The network drive backs up the rsync backup to its twin.
The beauty is that it’s completely automated. Using rsync keeps the size of each incremental backup to a minimum.

Security is the largest concern at this point. A randomly-generated 30-character password should take care of a lot of the scanner-bots out there. The only port which is open to the outside world is SSH. Fortunately you can do everything that needs doing (remote login, FTP and rsync) all through SSH. For additional security, I also set SSH to a non-standard port.

Wondering what the pro’s do, I had a chat with an IT expert. He said that the only real way to do offsite backups is with tape. I can see the point; if the computer filesystem gets corrupted, or data deleted, then that missing data can carry through to the local, then offsite backup. The primary aim of my backup system is disaster recovery; coming back from total data loss. Using Time Machine on the backup drive covers against individual file loss, but at the moment there’s no way to recover against both issues.

So for the future I might add a tape system in with the network drive, to have better timed data recovery. But at the moment, I’m pretty happy with how the system is set up. For reference, here’s the (rather unwieldly) command to back up one drive to the other:

rsync -aviPh --progress --delete-after -e 'ssh -p 2345' --rsync-path=/mnt/Drobo-FS/Shares/DroboApps/rsync/rsync /mnt/Drobo-FS/Shares/Backup/ backup@ssh.example.com:/mnt/Drobo-FS/Shares/Drobo2/Backup/