Category Archives: computing

UPL

When I was at university, for my undergraduate thesis, I wrote an excel add-in that performed pit optimisation calculations.

Over the years, I’ve received a surprising amount of requests for UPL. There’s definitely a demand for a free pit-optimisation program, particularly for universities and other smaller organisations that cannot afford expensive full-featured packages such as Whittle.

It’s particularly good for students, as it can teach the basics of block-model optimisation without getting too bogged down in fine details, or for creating a first-pass result. Having Excel as its front-end was an excellent choice, as it is a user interface that everyone understands.

The original site I had for UPL is dead, so I thought I’d create this page, and redirect the original page here.

You can download UPL from this link.

WordPress Twenty Seventeen – Four-Column Footer

One of the trickiest things I found to do with the WordPress Twenty Seventeen theme was to try and have a four-column footer.  I found a couple of plugins to do the job, but they either didn’t work, or they were far too complex. In the end, I found an easy solution put a basic HTML table into a ‘custom html’ widget inside of ‘Footer 1’. To do this:

Admin > Appearance > Widgets. The drag ‘Custom HTML’ to the ‘Footer 1’ widget.

The base HTML code for a four column table is:

<table id="logo-table" style="width:100%">

<tr>
<th style="text-align: center; width:25%;">Heading One</th>
<th style="text-align: center; width:25%;">Heading Two</th> 
<th style="text-align: center; width:25%;">Heading Three</th> 
<th style="text-align: center; width:25%;">Heading Four</th>
</tr>

<tr>
<td style="text-align: center;">Item One</td>
<td style="text-align: center;">Item Two</td> 
<td style="text-align: center;">Item Three</td> 
<td style="text-align: center;">Item Four</td>
</tr>

</table>

This did 90% of the job. There was just one other thing I wanted to do: Make the footer full-width. By default, Twenty Seventeen has two half-width footers. I also went in and changed the css so that the footer was full-width.

Admin > Appearance > Customize > Additional CSS

Add in the following code:

.site-footer .widget-column.footer-widget-1
{
width: 100%;
}

.site-footer .widget-column.footer-widget-2
{
width: 100%;
}

The end result:


WordPress Twenty Seventeen – Change footer colours

To change the footer colours using the Twenty Seventeen theme in WordPress; go to:

Admin > Appearance > Customize > Additional CSS

Add in the following code:

.site-footer { background: #2000a1; }

.site-footer {
    color: #ffffff;
}

.site-footer a {
     color: #ffffff;
}

.site-footer a:hover {
     color: #ffffff;
}

The #ffffff is white, and #2000a1 is a blue colour. The output should look like this:

WordPress Twenty Seventeen – Change uppercase title

I’ve recently been modifying the website for the church I used to attend when I lived in Blackwater – coalcitycc.com.au

The main thing I did was change the theme from the old ‘Pinboard’ theme to the newer ‘Twenty Seventeen’ them. It’s a fantastic theme that I was able to do a lot of things with. There were a few things that I had to figure out how to do. The next couple of posts will be a few short ones so I can document the changes I made.

The most annoying thing with the new theme was the uppercase title on the homepage. To change this – go to ‘Admin > Appearance > Editor’ then select ‘Stylesheet’ ‘style.css’. Then scroll down to line 1580. The ‘site-title’ section should look like this:

.site-title {
clear: none;
font-size: 24px;
font-size: 1.5rem;
font-weight: 800;
line-height: 1.25;
letter-spacing: 0.08em;
margin: 0;
padding: 0;
/* text-transform: uppercase; */ <--- add in these comments
}

As I’ve marked above, comment out the ‘text-transform: uppercase;’ part to remove the uppercase font on the title.

As you can see from the picture below, it works well!


Odroid – turn off blue light

When the Odroid is running, it’s got a bright flashing blue light. I found this to be very annoying, so I found a way to switch it off. You can switch it off directly by running the code:

su -
echo none > /sys/class/leds/blue\:heartbeat/trigger

But for a more permanent solution, just add the second line to the file –

/bin/odroid-tweaks

This file gets called by odroid-tweaks.service, which gets run at startup.

Odroid XU4

I picked this up a couple of weeks ago. It’s the Odroid XU-4. It’s basically a Raspberry Pi, but with significantly enhanced specifications – it uses a Samsung Exynos processor, EMMC storage and 2GB ram.

It’s about twice the price of the Pi, but with over 4x the performance. It can run a variety of Linux and Android OS’s, with images supplied by the factory, though you can use any you want, provided you can compile up the right kernel.

You really notice the performance increase over the Pi. The eMMC storage, in particular, is vastly faster than running of an SD card like the Pi does.

I thought I’d use it as a Linux server. I wanted to try to run one at home, but I didn’t want to run my large desktop computer, with its high power needs. The Odroid only uses a few watts at peak.

So how’s it working? It works great. I’ve currently got this blog and another site that I use hosted on it, and I think it actually works quicker than the shared hosting that I was using previously.

Script to change keyboard on Windows 7

I’m currently working in a client’s office, on an extremely locked-down Windows 7 PC. As usual, I want to change to the dvorak keyboard layout, which is my standard. However, the environment on the computer is reset every couple of days, which wipes out my keyboard setting.

So I started looking for a way to change it through a powershell script. Unfortunately, Windows 7 only has an extremely limited version of powershell. But I was able to find a way to change it using an xml script at these two sites:

https://msdn.microsoft.com/en-us/goglobal/bb964650?f=255&mspperror=-2147217396#eyb

https://superuser.com/questions/395818/how-to-change-keyboard-layout-via-command-line-cmd-exe-on-windows-xp-7

Combining them both together, I put together the following xml file:

<gs:GlobalizationServices xmlns:gs="urn:longhornGlobalizationUnattend">

<gs:UserList>
<gs:User UserID="Current"/>
</gs:UserList>

<gs:InputPreferences>

<!-- Add Dvorak -->
<gs:InputLanguageID Action="add" ID="0409:00010409"/>

<!-- Remove US default-->
<gs:InputLanguageID Action="remove" ID="0409:00000409"/>

</gs:InputPreferences>
</gs:GlobalizationServices>

The trickiest part was finding the code for the dvorak keyboard, which is 0409:00010409

The code to execute the xml file is:

control intl.cpl,, /f:"Desktop\changekeyboard.xml"

Which I then put into a .bat file which I keep on the desktop. So, whenever, the keyboard changes, I just double-click the bat file, and the keyboard is fixed again, and I end up with the keyboards as so:

Permanent redirect to https

This is a bit of a follow-on from my previous post, in which I was setting up https access on my website.

Once you’ve got https set up correctly, you might, like I did, want to make sure that all traffic to your website now goes the the SSL connection, rather than through an unencrypted connection.

On Linux hosting, like I have with Quadra Hosting, this can easily be done by creating a ‘.htaccess’ file. Create one in the root level of your hosted directory (the one where you have your index.html file). In the .htaccess file, put in the following lines:

RewriteEngine On
RewriteCond %{HTTPS} off
RewriteRule ^(.*)$ https://%{HTTP_HOST}%{REQUEST_URI} [L,R=301]

This will redirect all traffic to the SSL connection.

Setting up Let’s Encrypt with Quadra Hosting

For the last few years, I’ve been using Quadra Hosting for my web hosting needs. Their servers are great, with good speed and connection, and they’re reasonably priced. They also have the best customer and technical support that I’ve ever seen, bar none. I highly recommend them if you’re looking for a new web host.

Let’s Encrypt is a project that has set out to ensure that all web traffic is encrypted. To that end, they have changed the traditional process of obtaining SSL keys to a much simpler one, and provide them for free.

Also, Chrome will soon be warning users anytime they visit an unencrypted website. With these two factors, I thought I’d set about trying to install a Let’s Encrypt key onto my Quadra hosting account. As you can see from the green lock in the address bar for this site, you can see that I was successful!

Let’s Encrypt’s preferred method of installation is via CertBot client that runs on the server, and installs and renews the keys. However, a quick check with the technical support team at Quadra, and I realised that this wasn’t going to work on shared hosting, where I don’t have low-enough level access to the server.

Fortunately, Let’s Encrypt and others have provided a variety of different ways to install some keys. They have scripts for a variety of different languages. One that I came across was a bash script that can run on shared hosting without root access. It’s simply called acme.sh. It worked really well.

Here’s the process that I went through to set up Let’s Encrypt with the acme.sh script.

  1. Go to your Quadra Hosting control panel, and turn on SSL connections, by going to ‘Domain Settings’, then ‘SSL’ and then clicking the ‘Generate self signed SSL certificate’.

generate-self-signed-ssl-certificate

Click ‘submit’ on the next page, then just ignore the page of keys that comes up after that. You won’t be using those keys, but it has activated the SSL functionality for the server for your domain.

2. Next you’ll need to install the acme.sh script. To do this, and most of the rest of the steps, you’ll need shell access. It’s not turned on by default, so you’ll need to fill out the shell access request form and send it through to the Quadra Hosting support team. Then, when you’re logged on, enter

curl https://get.acme.sh | sh

This will download and install the acme script. At this time, it tries to install an alias to acme.sh, but it failed for me. I had to manually edit the .bashrc file and added in the following line:

alias acme.sh='~/.acme.sh/acme.sh'

This can be done simply by entering the following line

printf "alias acme.sh=\'~/.acme.sh/acme.sh\'" >> .bashrc

then reload your bashrc by either logging out / in, or by typing

source  ~/.bashrc

3. With the script set up, you can now download and install your SSL key. The first step is done with the ‘issue’ command:

acme.sh --issue -d systematictechnology.net -d www.systematictechnology.net -w ~/systematictechnology.net/

This contacts the Let’s Encrypt servers and will generate some SSL keys, and copies them to the acme install directory. It’ll give the location of these new certificates:

[Thu Nov 10 01:46:53 GMT 2016] Your cert is in  /hsphere/local/home/xxxx/.acme.sh/systematictechnology.net/systematictechnology.net.cer
[Thu Nov 10 01:46:53 GMT 2016] Your cert key is in  /hsphere/local/home/xxxx/.acme.sh/systematictechnology.net/systematictechnology.net.key
[Thu Nov 10 01:46:53 GMT 2016] The intermediate CA cert is in  /hsphere/local/home/xxxx/.acme.sh/systematictechnology.net/ca.cer
[Thu Nov 10 01:46:53 GMT 2016] And the full chain certs is there:  /hsphere/local/home/xxxx/.acme.sh/systematictechnology.net/fullchain.cer

4. Next up, you need to install the newly created certificates. This is done in two ways. Firstly, through the control panel, then through the command line. This is so that both Quadra and the script know the certificates.

Firstly, log onto the server with an FTP client and download or view the four certificates which were listed in the key creation message (above).

On the control panel, go to ‘web options’ then select ‘edit SSL support’.

edit-ssl

This will bring up a page with some areas in which you can paste in the keys. Put in:

  1. Install yoursite.key to ‘Certificate key’
  2. Install yoursite.cer to ‘Certificate file’
  3. Install ca.cer to ‘Certificate Chain file’


The Certificate Key and Certificate file can be uploaded at the same time, but the Certificate Chain File will need to be uploaded separately.

Once that is done, go back to the command line. You’ll need to change the permissions on the ssl key folder:

chmod 0600 ~/ssl.conf/systematictechnology.net/*

Install the keys again using the acme script:

acme.sh --installcert -d systematictechnology.net --certpath ~/ssl.conf/systematictechnology.net/server.crt --keypath ~/ssl.conf/systematictechnology.net/server.key --capath ~/ssl.conf/systematictechnology.net/ca.crt


Note that this will throw a few errors: The script will also try and install some backup keys, which it won’t be able to do. I don’t consider this a problem, as the keys primary location is in the acme.sh directory anyway.

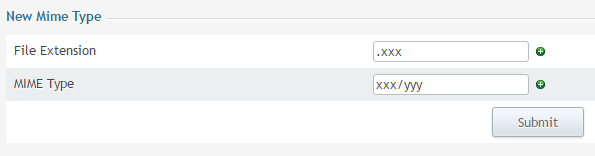
5. Reboot your apache instance to reload the new keys. There is no direct to do this, but the Quadra support team suggested a simple workaround. Go to Web Options for your domain in the control panel, then click on the ‘Mime Type’ button.
mime-typeOn the window that pops up, enter some dummy data, hit ‘submit’

mime-entry

Then click on Save / Apply in the Web Options window. Wait a few minutes, then click on the red ‘X’ next to the new Mime type. This will delete the new entry.

mime-type-2

Click Save / Apply again. This will reboot the apache instance, and load up the new keys.

6. Test the installed certificate. Wait for five minutes for the server to reboot, then go to https://yoursite.com . If all the steps above have worked then it should be working nicely. Next, check that the cron job to renew the certificates has installed correctly. This should have been done when the acme.sh script was installed. Check it now.

This can be done through either the control panel (go home -> tools -> cron) or through the command line:

crontab -l

You can also go to SSL Lab’s SSL test to see that everything is working correctly.

7. Celebrate! You’ve now got SSL working on your site, celebrate that you’re doing your small bit to make the whole web a bit more secure.

Addendum:

After I posted this article, I sent a link through to Quadra support with a note along the lines of ‘here’s a guide I made up, please feel free to send it to any other customers who might be trying to do the same thing.’

I shortly got a response from the support team. The team member who’d been helping me with this setup not only responded and corrected some mistakes I’d made, but he also wrote: “You could also mention that we would be happy to do all this for them if they asked us to, e.g. if they are not used to shell commands.”

This surprised me no end. The Quadra Hosting team sell a one-click SSL implementation, which only costs $30, and requires no technical skills at all. Rather than suggest “You could also mention that we have a cheap one-click SSL implementation if they are having difficulty with Let’s Encrypt.”, they instead suggest that they could forgo making that money, and instead spend time help you implement a no-cost alternative.

If you’re not with Quadra yet for your hosting, change. This is just a small example of how good they are.