Introduction
Motolegion are a brand of jeans designed by Australian brand RHOK. I recently purchased a pair, and this is my review of them.
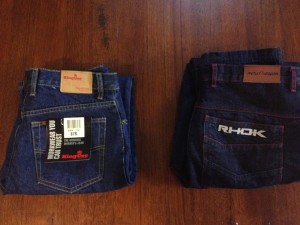
For the purposes of this review, I’ll be comparing the jeans against some work-issued jeans that I have – some King Gee jeans.
King Gee’s (left), RHOK (right)
Ordering and Delivery
Ordering was very simple from the RHOK website, though the website seemed confused as to how much the jeans were – the page said $145, but the Paypal checkout said $146.
Once I placed my order, I waited for 11 days, with no jeans in sight. I sent off an email, and was quickly replied to by Marinko. They were out of stock, but had forgotten to let me know. They said that they would ship the jeans in a couple of weeks. A couple of days later, however, I received another email, saying the jeans had been mailed, but they had probably sent the wrong size.
When the jeans arrived, they were indeed the wrong size. Marinko was very apologetic, and immediately sent up the correct size jeans, and a pre-paid express post satchel to send the wrong jeans back.
First Impressions
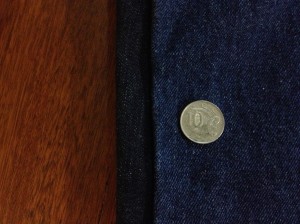
My first impression of the jeans was how thin the material was! I was expecting a very heavy, thick denim, but the denim felt a lot thinner and flexible to my fingers than the King Gee’s. A measurement with my micrometer confirmed by suspicions – the RHOK’s measured at 0.77mm vs the King Gee’s at 0.93mm. This obviously doesn’t matter from a protection standpoint, as the Kevlar does the protecting, not the denim, but the jeans may not last as long as I’d hoped.
What the jeans lack in thickness, they definitely make up for in weight. The King Gee’s weigh in at 804 grams on the scale, the RHOK’s are 1.10kg! I don’t know where the weight comes from – probably the kevlar panels, and the huge amount of thread which has gone into stitching these jeans together.
The stitching is very heavy duty. I’ll comment more on it later.
Stylin’
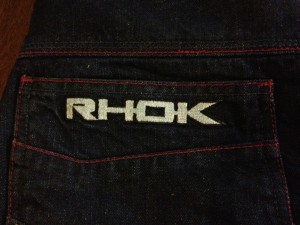
The jeans are not subtle at all. Red stitching all around, and a giant logo on your ass. If there was one aspect of the style of the jeans that I could live without, it’s the logo. Given that I usually wear work-issued jeans most of the time, and these come with the corporate logo on the back, I’m not totally adverse to this idea. However, the sheer size of the logo is off-putting.
Giant Ass Logo
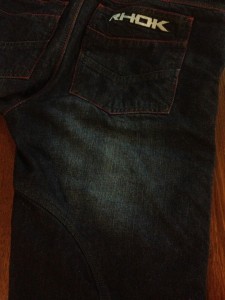
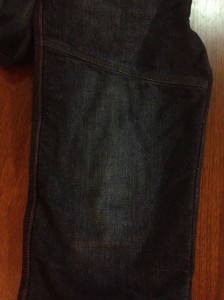
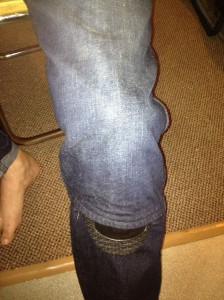
Some of the panels, such as above the knee, and the seat also come pre-distressed. The ‘blue’ colour is also very dark. While not black it’s definitely on the ‘navy’ side of blue.
Distressed panels
Cut
The jeans are quite long, about 1cm longer than the 87R King Gee’s, which are a very traditional 501’s – style cut.
They’re also quite wide at the boot. You’ll have no trouble at all fitting these over your Sidi race boots. Each leg averages about 1cm wider when laid flat.
Width and colour difference between the two jeans.
The belt loops are a little bit narrow in length. My belt just squeezes through.
Stitching
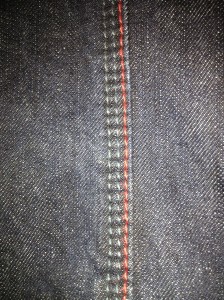
The stitching is extremely heavy-duty. All of the important seams are triple-stitched. One area of concern is that all the stitching is external, and doesn’t have the ‘two under, one over’ style that is found on other jeans – like the King Gee’s. This raises a slight concern that in a bad slide the stitching may possibly wear through, though this seems highly unlikely, given the strength of the stitching.
Ultra-heavy-duty stitching
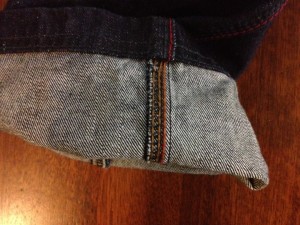
Internal Stitching, RHOK’s
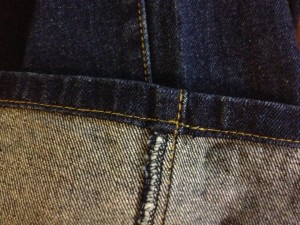
Internal Stitching, King Gee’s
Each stitch has a massive amount of thread going through it. I’d like to know just what percentage of the weight of the jeans is made up of thread!
Comfort
On the bike – When on the bike, the jeans are perfectly comfortable, and don’t get in the way at all. However, I found that one of the seams appears to settle right on the inside of my knee, which is uncomfortable when hugging the tank. When I sit on the bike, I need to spend a second to make sure that the leg is rotated so that the seam is out of the way.
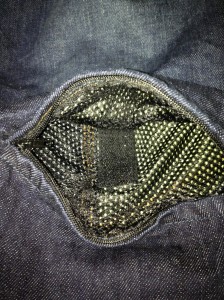
Off the bike, the jeans are surprising uncomfortable. The main culprit is the velcro panels inside the knee pockets. Because they face towards the outside of the jeans, the velcro strip basically sits against your leg, tempered only by the thin mesh material. The sharp edges (especially the corners) of the strip poke through the mesh, and onto your leg.
This isn’t unbearably uncomfortable, but it’s pretty much continuously noticeable. I’m hoping that they soften up with wear and washing.
The Kevlar panels themselves are completely comfortable. You won’t even notice that they’re there.
Protection
The Kevlar protection is excellent, huge panels of kevlar weave covering all parts which are likely to slide along the ground in an accident. All the panels are the same size as the denim panels, and stitch into the same seams.
The hard protectors are highly weird, when compared to my other pair of riding pants (Motoline textiles). They are a standard ‘hard plastic over breathable foam’ style of protector. The knee protectors are a standard shape.
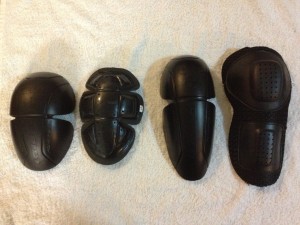
The shape of the hip protector, however, seems all wrong. They look like they have come out of a jacket, not a pair of pants. For comparison:
This is a side-by-side with the knee / elbow-forearm protectors from my Spidi jacket next to the shoulder / hip protectors from the jeans. The shoulder / hip protectors are nearly identical in shape.
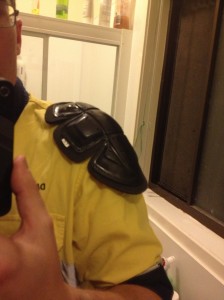
Perfectly fitting ‘hip’ protector
When the hip protectors are in place, it makes you look like you’re wearing jodhpurs – it gives you fantastically wide hips. The protectors just stand out from your body, and don’t conform at all. There is a good centimetre of air from your body to the protector in the middle of the hump.
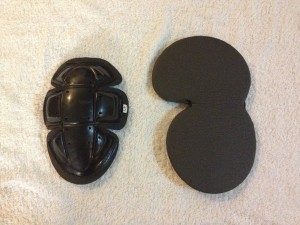
By comparison, here’s the hip protector from my Motoline textile pants.
One of these is designed for human hips.
The knee protectors can be inserted and removed through cleverly designed hidden zips below the knee.
The knee protectors go into mesh pockets that have ‘hook’ velcro on the bottom of the pocket. In addition to causing the comfort issues mentioned above, they also destroy the pocket itself. Every time you open the pocket, the hooks on the velcro tear at the mesh, which in my case is already starting to fuzz up from the abuse.
Knee pocket with Vecro ‘hook’ side up
The knee protector pockets are massive in the ‘up’ direction – they go halfway up my thigh. However, they’re not long enough in the ‘down’ direction. When I fit the pads so that they’re comfortable with a bent knee, the pads stick out the bottom of the pocket, so that the pocket can’t be done up! This is an epic flaw in the design.
They fit just fine if I rotate them 180 degrees, but I think they were meant to protect the shin, not the thigh. At this point in time, they’re just not usable. I’m going to either have to cut the knee protector with a Dremel tool (not a generally good idea, since it’ll leave some sharp edges), or buy a more standard foam protector and cut it to shape.
Summary
I bought these jeans hoping to ride them to work every day, to pop out the knee pads, and then work all day. As it stands, I can’t see myself doing that.
The knee pads are too difficult and time-consuming to put in. The hooks on the velcro also tear up the mesh extremely rapidly. Taking the protectors out once or twice a day is going to destroy the mesh in very short order.
I have two options – ride to work with the protectors in, then change to a different pair of pants. If that’s the case, I may as well wear a pair of waterproof textile pants. My second option is to ride without the protectors in place. That’s the option I’m taking at the moment, though riding without knee protectors is a concern.
The style and cut of the jeans seems aimed at a younger market segment. This is not a bad thing, but something to be aware of if you’re interested in purchasing these jeans.
Overall, I’m disappointed in the jeans. They’re not as good as I was hoping for, in comfort and practicability. I honestly can’t see myself buying another pair of these jeans, unless some of the recommended changes below are made.
Recommendations
Please note, that these recommendations are only based on my personal experience and tastes – YMMV. These are in order of my preference.
1. Fix the knee pad pockets or protectors, so that they actually match each other in size.
2. Remove the ‘hook’ velcro on the inside of the mesh pocket. Replace it with ‘loop’ velcro on the top side of the mesh pocket, then allow the owner to decide if they want to attach the ‘hook’ side to the protector.
3. Have a hip protector that is actually designed for human hips.
4. Have a second ‘subtle’ jeans style, for those who don’t want a giant logo on their ass.
5. Have a jeans style that has a more traditional tapered leg cut.
6. Make the belt loops about 3mm longer.
