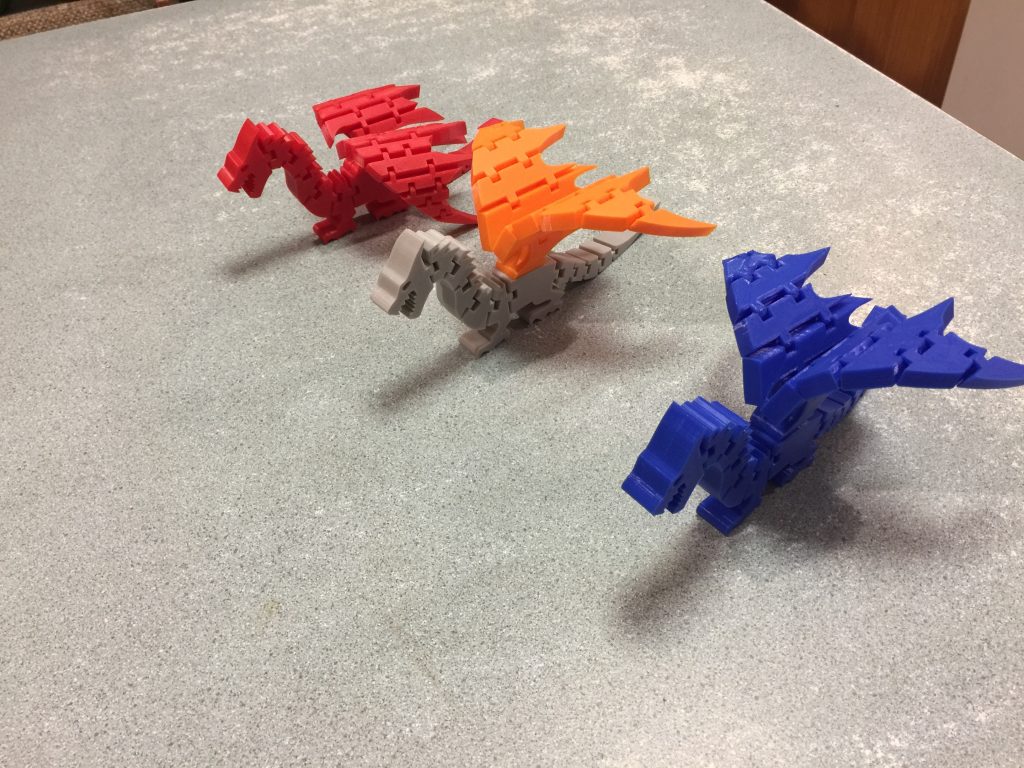
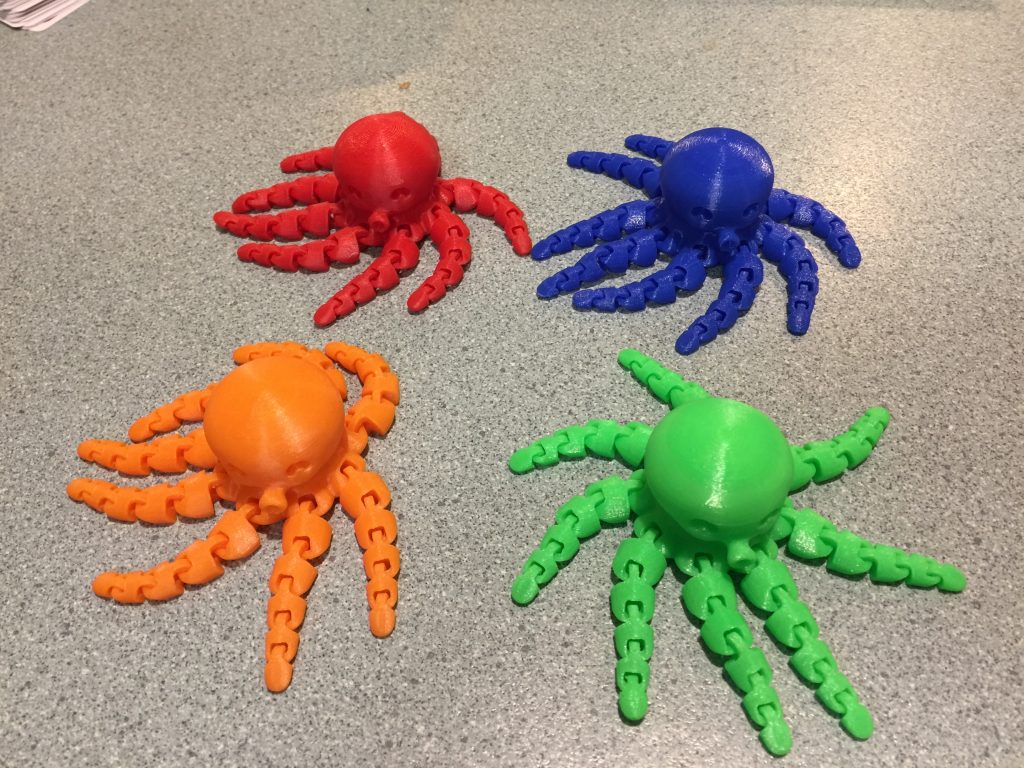
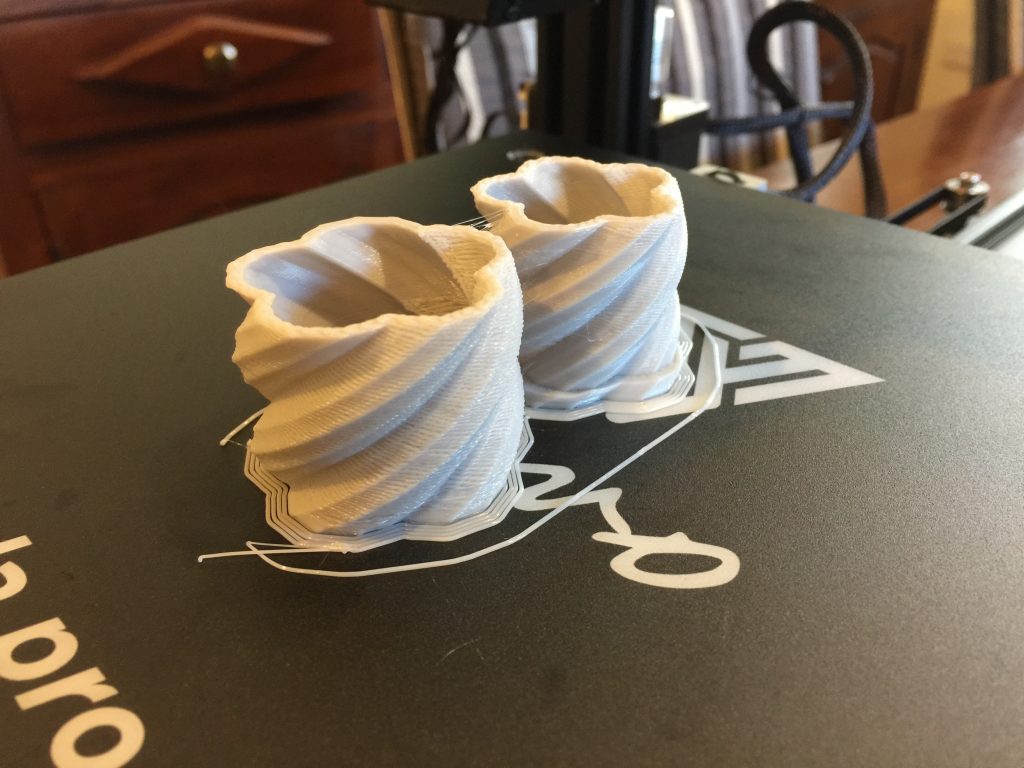
I bought some new filament colours a couple of weeks ago, which were an immediate hit with the kids. Since then, I’ve been printing out a few toys for them and their friends, mostly dragons and octopi.
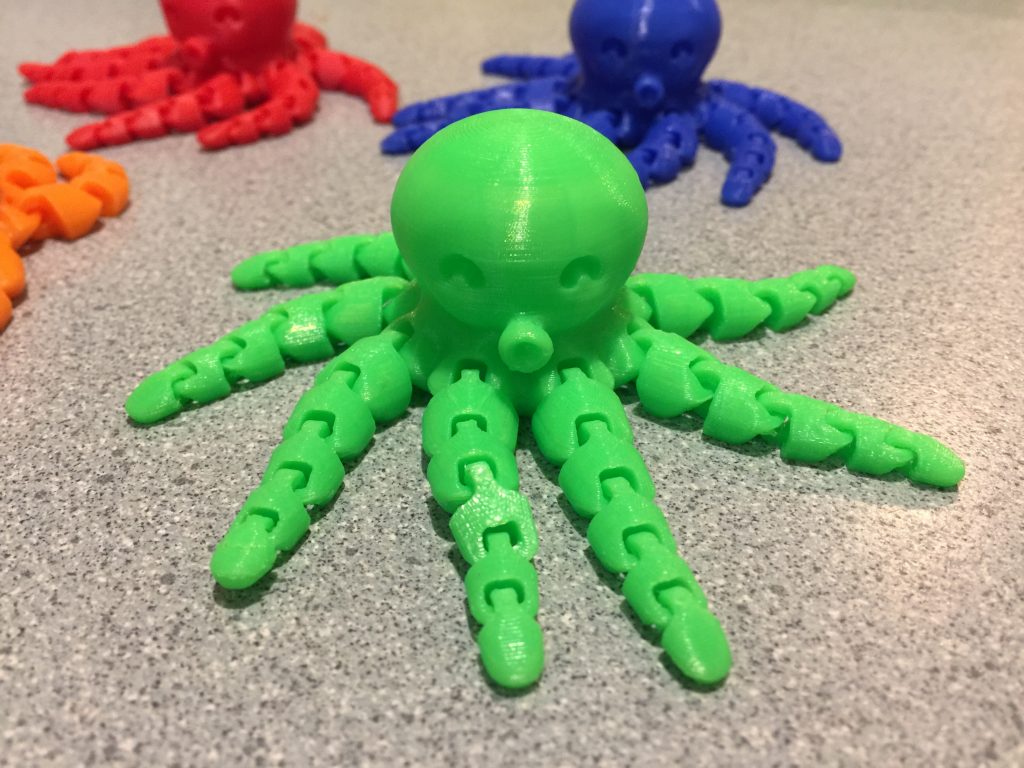
I’ve had to tweak my slicer settings a bit to get the octopus to print correctly, since it has some very-small surface area features that had trouble sticking to the bed. Changes:
Bed temperature 71 degrees.
First layer temperature 205 degrees, remainder 195 degrees.
First layer speed 8mm / second (very slow!) – remainder is 30mm / sec.
No layer cooling until 1mm in height reached.
Using 0.05mm feeler gauge on the hot end and bed (when cold) to set nozzle height.
With these changes, the prints are coming out well, sticking to the bed, and looking absolutely fantastic. This level of detail would have been nearly unheard-of with the old Reprap machines back in 2012.
Even though the first print turned out very good, I knew that there was a lot of improvements to be made, so I did some calibration.
The guide I used for calibration mostly came from the 3D Nation guide. The primary steps I followed were:
Extruder rate
Extruder PID
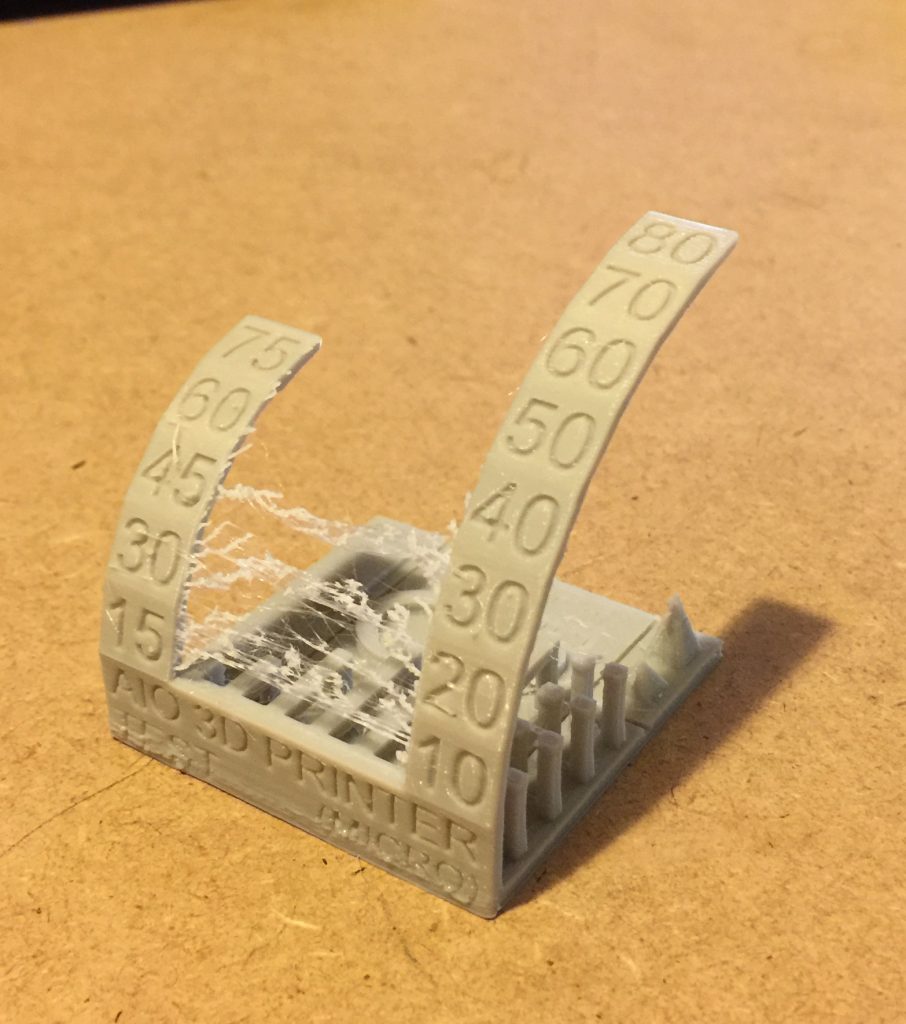
Temperature Tower
Retraction Test
The extruder rate calibration was pretty easy, removing the Bowden tube from the extruder and measuring the feed on 100m samples. I ended up having to adjust mine by about 0.5%. Commands use were:
M92 E400 - Set rate of extruder to 400.
M500 - Write this setting to the EEPROM
Next up was the Extruder PID calibration. Fortunately, the Marlin firmware makes this ridiculously easy with the following command:
M303 E0 C8 S210
and then taking a note of the outputs. For my printer:
Original PID
Settings:
Kp: 26.27 Ki: 2.49
Kd: 69.41
Final PID Settings:
Kp: 22.37 Ki: 1.81
Kd: 69.18
Which are then set using the command:
M301 P22.37 I1.81 D69.18
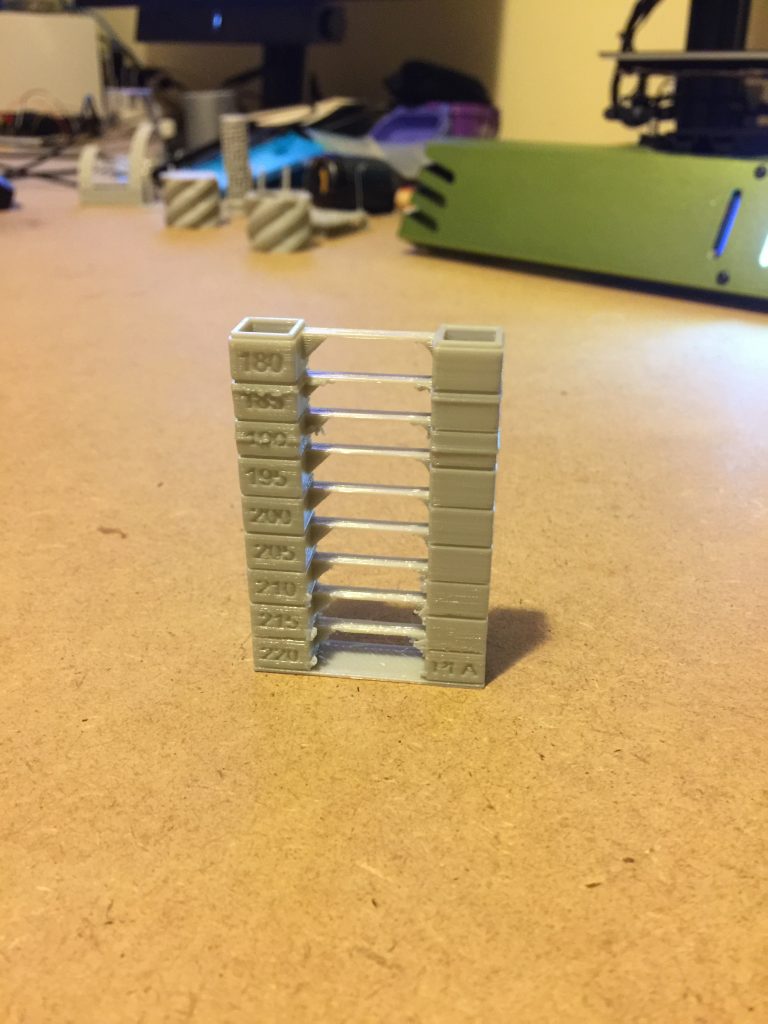
The temperature tower was the next test, which was pretty easy, given that you only have to load up some gcode and hit ‘print’
As you can see from the image, the filament I have works best at between 195 and 200 degrees, which is pretty typical. You can also see that the printer seized up at bit on the 185 and 190 degree layers. This was just a bit of binding on the z-axis leadscrew. Putting some lithium grease on the leadscrew solved that problem.
The next test was retraction. This one gave me quite a few issues. Overall, the print turned out great, but I just could not cure the slight stringing issue between the two towers, no matter what my settings. I’ve just accepted that this cheap filament is just a bit too stringy to be fixed. The stringing is extremely minor, and very easy to clean up after the fact.
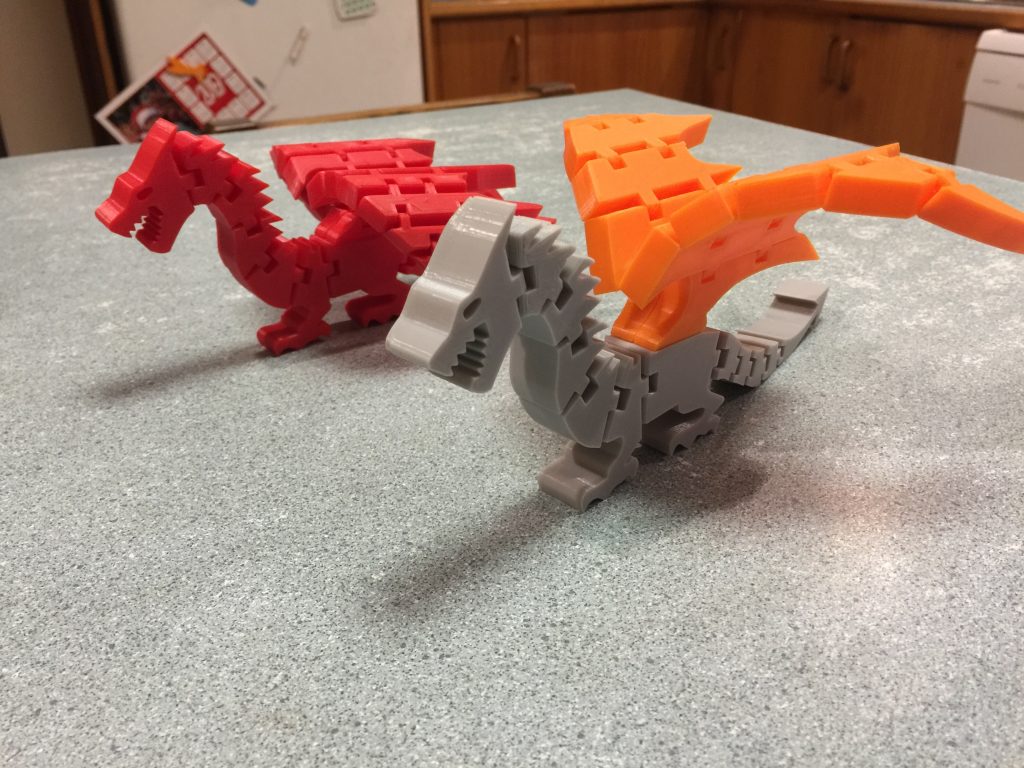
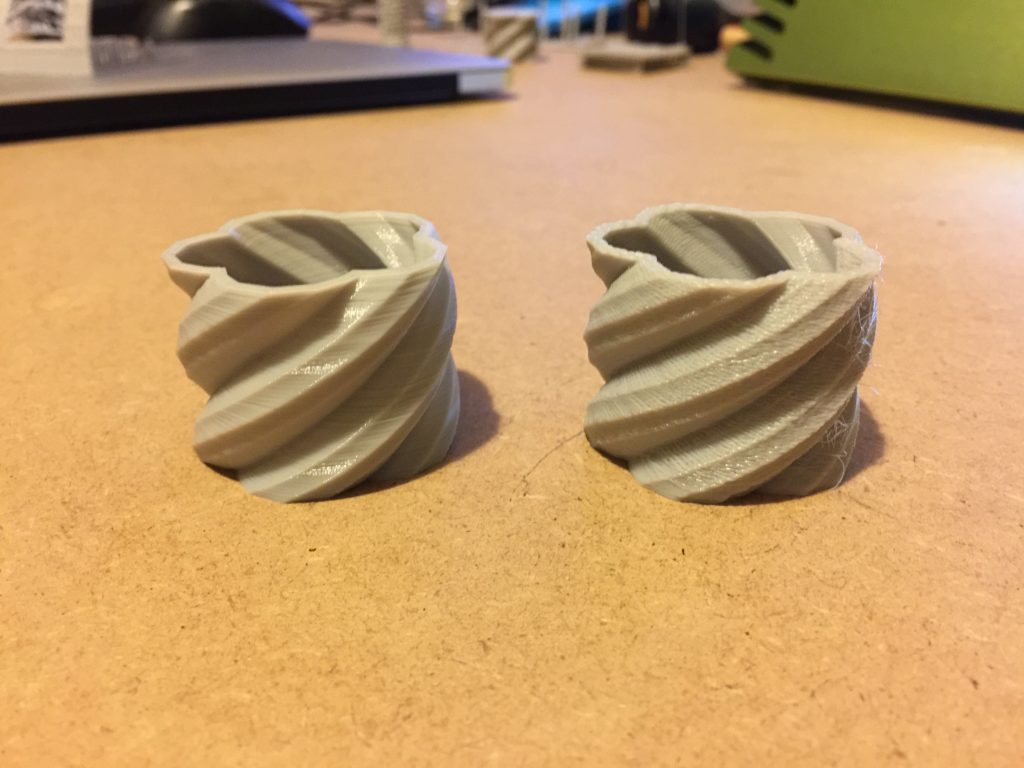
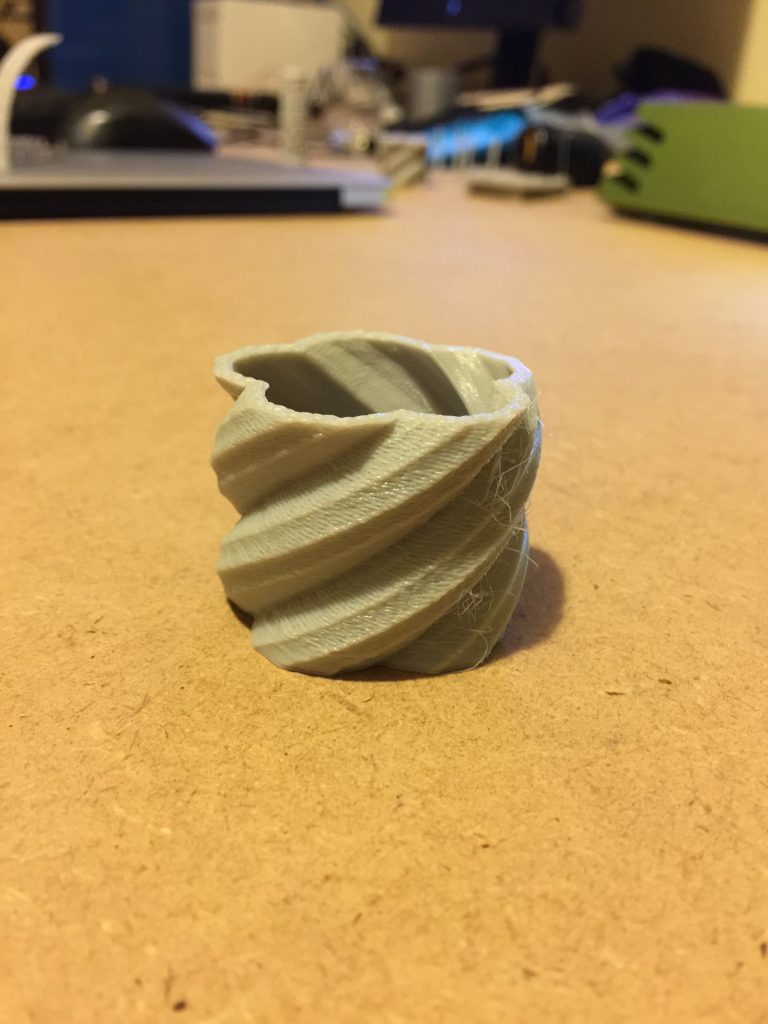
Here’s a comparison of the same piece – after (left) and before (right) calibration. As you can see, big differences. The new print is essentially perfect. Not really sure how to improve this much further.
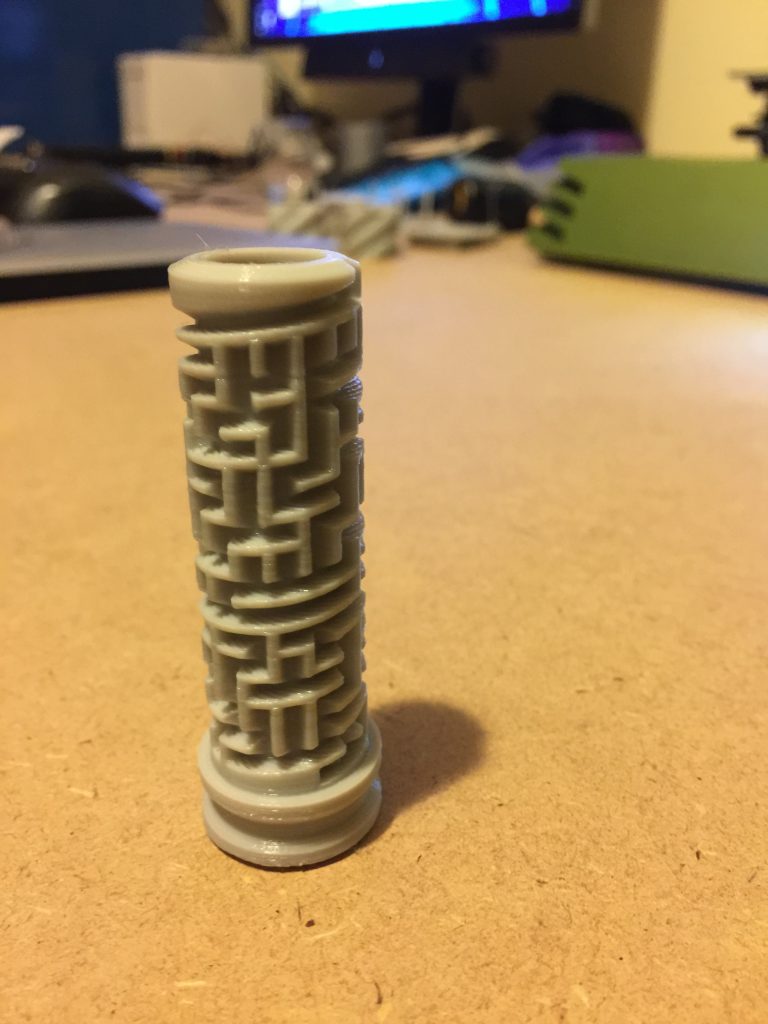
and another print of a puzzle box, which also turned out great.
I’ve been out of the 3D printing game for the last few years – gave it up after I had yet another hot-end meltdown on my Prusa. It’s been bugging me though, and I wanted to get back into it.
Rather than fix up the old printer, I thought I’d buy a new printer and see what sort of improvements the last few years have produced. I spent a bit of time looking around at the cheaper-end printers, particularly the highly-popular Ender 3.
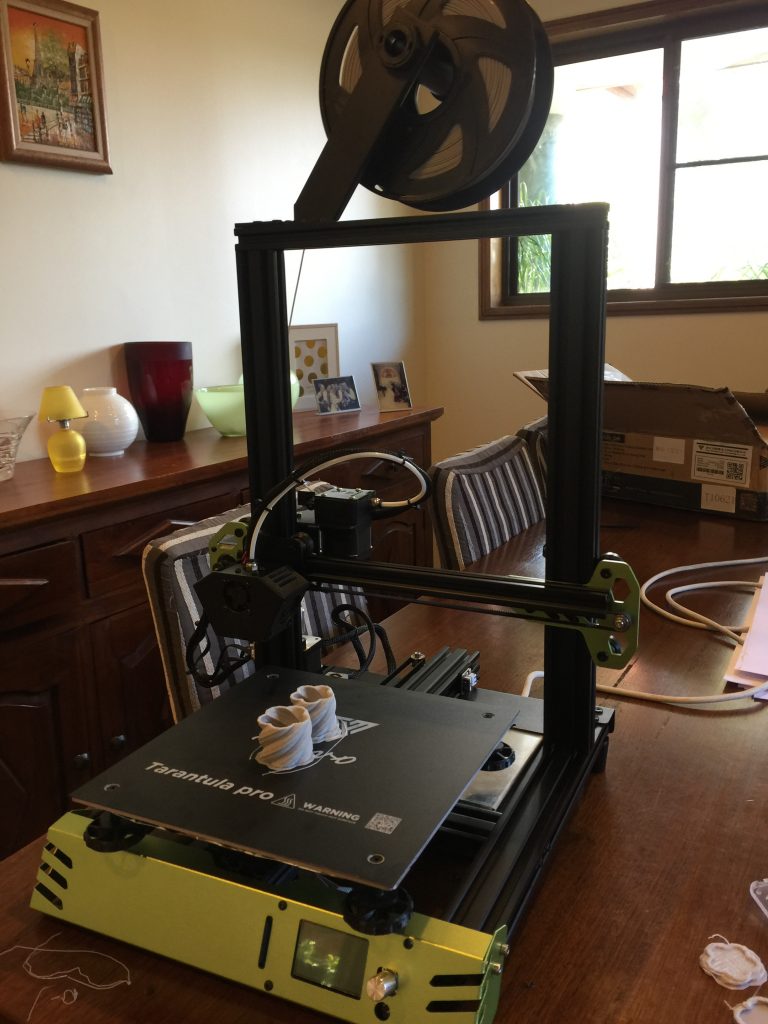
In the end, I selected the Tevo Tarantula Pro. It’s slightly more expensive than the Ender 3, but comes with some features which put it above the Ender:
Print cooling fans
Integrated design (all-in one)
Better electronics, with replaceable stepper motor drivers.
Most of these features are often after-market upgrades people make to their Ender 3. I figured by spending a bit more money up-front, I’d have to spend less down the road.
There’s been quite a bit of improvements in the general designs of 3D-printers in the last few years. Some of the most obvious improvements which seem to be common these days:
Improved electronics (usually with screens) MKS-Gen-L and the like is a big step up from an Arduino Mega with Ramps.
The extruded aluminium sections are almost universal these days (though the Prusa’s still use two smooth rods for the x-axis, though they are now aligned vertically, instead of horizontally)
Bowden extruders (though again, not with the Prusa)
Cooling fans, both for the extruder and the print. I’d probably have prevented a couple of hot-end meltdowns with an extruder cooling fan.
GT2 belts and pulleys. My old prusa was using T5, and when I stopped, a few people were moving to GT5 belts and pulleys.
1.75mm filament. 3mm was the standard back in 2012.
I ordered the printer from Banggood, and it turned up in less than a couple of weeks. I’ll make a couple more posts about the build, but for now here’s an image of the final product: