As I mentioned in my previous post, I had issues with the last print due to the high speed. I thought I’d slow this one down.
I also thought that I should be more meticulous about keeping records of the changes I’m making. In keeping with the original ‘lab notebook’ idea for this blog, here’s the settings.
Original settings:
From ‘Speed’
- Main Feed Rate – 60 mm/s
- Perimeter Feed Rate – 30 mm/s
- Travel Feed Rate – 130 mm/s
From ‘Raft’
- First Layer Main Feed Rate – 35 mm/s
- First Layer Perimeter Feed Rate – 25 mm/s
Changed Settings:
From ‘Speed’
- Main Feed Rate – 20 mm/s
- Perimeter Feed Rate – 15 mm/s
- Travel Feed Rate – 30 mm/s
From ‘Raft’
- First Layer Main Feed Rate – 15 mm/s
- First Layer Perimeter Feed Rate – 15 mm/s
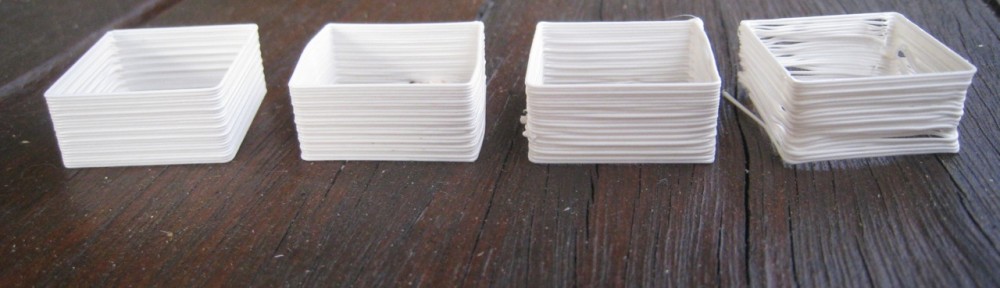
And the result:

As you can see, it came out looking nearly identical to the first part. So it looks like speed isn’t the problem. As another test, I decided to print out the ‘single wall calibration piece’. It came out beautifully.

Then I thought I’d try the 10x40mm piece. I stopped that one after about 8mm, it was just turning into a sludgy mess. I thought then that to print a piece like that, I’d need to turn down the temperature, or use active cooling. I thought I’d try turning the temp down.
To get a better picture of what was happening, I thought I’d print out the ‘ultimate calibration piece’. To start with, I turned the temp down to 225 degrees, (from 230).

You can see in the picture, that the first couple of ‘hanging beams’ are sagging a bit. I then turned the temp down to 220. The remainder of the object printed fine, but the sagging was noticeably reduced.

I stopped the print at that point, since the ‘shelling’ problem (can be seen in the problem above) was distracting me. It’s clearly seen in the ‘reprap shot glass’, and it looks like SF is not correctly shelling the object, and creating proper G-Codes. I thought I’d better fix that problem first, before messing with the temperature.