Overthinking the Problem

One of the things I try and teach younger engineers (whenever they’ll listen – damn Gen Y’ers) is that it’s possible to over-think a problem. You end up burrowing down so much that you become entangled in the work, and generally end up with a much more complicated solution than what’s actually required.

When thinking about changes that I had to make to skeinforge, I realised that I had too many variables – one of the classic symptoms of over-thinking. I had made too many changes to the original settings, and I wasn’t sure which ones I needed to change back, or other ones to change.

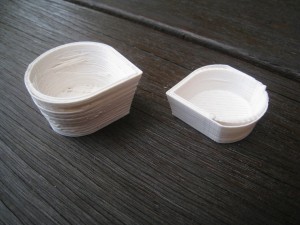
So I decided to take a step back, approach the problem from the start again. To do that, I deleted the skeinforge directory, and re-installed from latest download – going back to the original skeinforge settings, no adjustment at all. This would allow me to approach the problem fresh. I went back and re-did the shot glass.

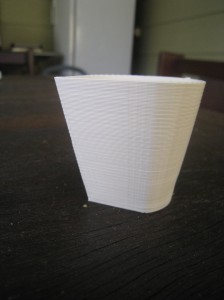
 It’s looking great. Still a bit strange, but vertically, it’s just about perfect.
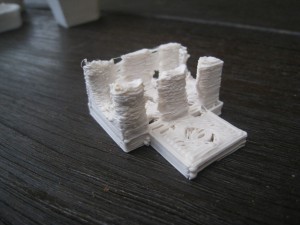
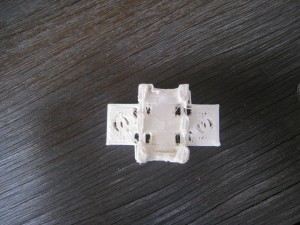
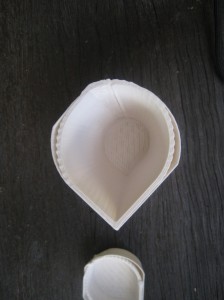
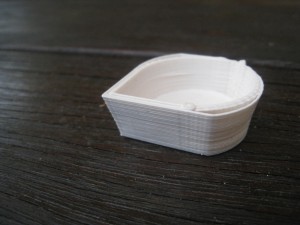
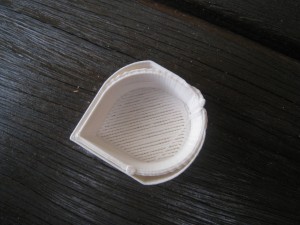
Emboldened by this success, I thought that I’d try and print out a useful part – a LM8UU Y-axis bearing holder. After looking at the options on Thingiverse, I finally settled for Digifab’s design.

Classic overspeed melted mess. That makes sense. When I did the shot glass, it was at original SF speed, up to 60mm / s. That was clearly way to fast for such a small piece as this. I’ll try it again tonight, but at a much slower speed.
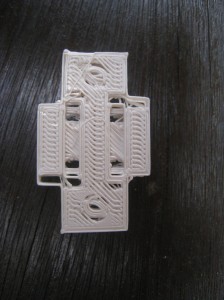
The heatbed is working great. No problems at all getting the prints to stick.
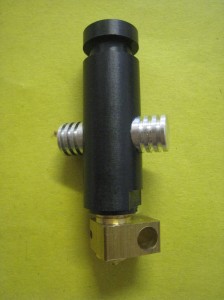
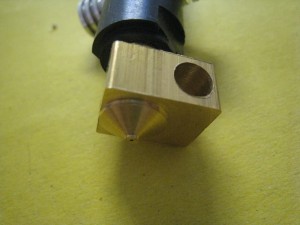


J-Head Hot End

After my meltdown, I bought two hot-ends. One was the Budasnozzle, with which I’m currently printing. The other, which just arrived yesterday, is the J-head Mk 3-B, which I bought from hotends.com.

Since I’m very happy with the Budasnozzle, I won’t bother using this one at the moment. I’ll just put it in the drawer as a spare part, or to provide it to a fellow Aussie who gets in distress with his printer.

Back to Printing

This afternoon, I re-assembled the printer. The differences are the Budasnozzle, and the stepper motors with their flats and pulleys.The Budasnozzle’s attachment really makes it easy to attach. Full marks for the designer.

My only problem with getting the printer running was that the hot-end was not warming up. A quick going-over with the multimeter showed a bad connection in going to the nozzle, which was quickly fixed up.

To print, I thought that I’d try the shot glass again, to give me a good idea of the differences between the old set up and new.

As you can see from the photos, the backlash is all but gone. The aluminium pulleys really make a massive difference here.

As I can see it, there’s three problems now.

Problem 1. Flat side on the print.

Solution 1. I suspect that the wires going to the hot-end are too tight (the Budasnozzle’s lines are shorter than the Arcol’s). Check tightness, and loosen off if necessary.

Problem 2. Extra shell around the outside of the print.

Solution 2. Turn retraction back on.

Problem 3. Base not quite filled in enough.

Solution 3. Infill feed rate

Hopefully, those problems should have the prints looking good.

Budasnozzle

After my disastrous hot-end meltdown, I tried to order in some parts for my Arcol hot-end. Unfortunately, Laszlo was out of parts for his hot end, so I had to go looking around for other alternatives. In the end, I bought two, with one to have as a backup. One hot-end I found is still to arrive, but this one arrived a few days ago.

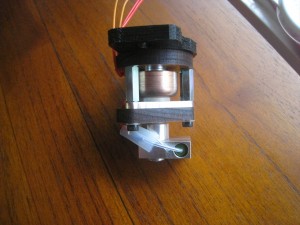
BudasnozzleIt’s the Budasnozzle, which I purchased from Lulzbot. It’s based of the Arcol design, but with some variations. It’s noticeably shorter, cutting down on the body heat-sink length, which I agree is far too long. It also uses a different type of thermistor, the slightly larger type, that looks more like a standard resistor. This type of thermistor should be much easier to replace than the ‘glass bead’ sort.

It’s very professionally built. All the parts are excellently machined, and assembled with precision, and with an eye for detail.

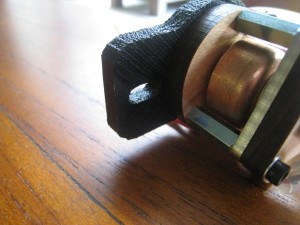
It’s best feature, however, is the attachment. As I’ve mentioned previously, the Acol hot-end has difficultly attaching with some extruders. The Budasnozzle has a printed base on it that has holes in the exact same locations as the extruders. So when you attach your extruder to the X-carriage, you’re also securing your hot-end. This also gives it a very large stable base to work from. An excellent approach that I think a lot more hot-ends should take.Budasnozzle mountI’ll put in action this weekend and get back to printing. Hopefully, it last longer than the last one did.

Offsite data backups

One of the big problems that small companies, and homes is off-site backup. Previously, I’ve done what I’m sure many people do; I have a big HD that I take to work. Once a month, I bring the big drive home, sync it with my home drive, then take it back to work and put it in the filing cabinet. I’m not concerned about anyone from work stealing the drive, or the data off it.

That’s good enough for people like myself, for whom a month’s lost data is more of an inconvenience than a disaster. But a small business needs to have a much better option. My Dad’s business is that way. It’s only a very small business, but he needs to be able to have an almost complete record of his email history. Only the loss of a few day’s data is acceptable.

The solution I originally had was to use Apple’s Time Machine backup onto an external disk. Then he was to swap the disk with one at home every month. This worked fairly well, but I kept thinking it could be done better. Make the system better, and not require him to shuffle drives.

What led me to change my thinking was Dodo‘s new unlimited broadband plans. They’re reasonably priced, and have completely unlimited data. Though they’re significantly more expensive when rural than urban, but still pretty good (only $20 / month more than my 10GB plan). My main concern with Dodo was that their network speed wouldn’t be up to scratch. Most of the time it’s excellent. It’s usually only on weekends that I notice that it’s hard to get above a couple of hundred kb/s.

So an unlimited data plan covers getting the data offsite, but where to store it? At the moment, there’s several providers who do data backup ‘to the cloud’. These are typically fairly limited in the amount of data that they can store, though prices range from good to ordinary.

The answer I came up with was network drives. A friend suggested the Drobo network drive, and after having a look at them, I thought that they would be ideal.  The DroboFS has five drive slots, so you’ve got a lot of store with good redundancy. With 2TB drives and dual redundancy (any two drives can die), you can still store about 5.5 TB of data.

Being network-enabled, they can also talk across networks. The drobo’s can be installed with a variety of software, including OpenSSH, rsync, FTP software, and a bunch of others. So I bought two of them. One to set up at the office, another at home.

So the system I’ve got now goes like this:

  • Local computer uses Time Machine to back up hourly to the network drive.
  • Local computer also uses rsync to back up daily to the network drive.
  • The network drive backs up the rsync backup to its twin.
The beauty is that it’s completely automated. Using rsync keeps the size of each incremental backup to a minimum.

Security is the largest concern at this point. A randomly-generated 30-character password should take care of a lot of the scanner-bots out there. The only port which is open to the outside world is SSH. Fortunately you can do everything that needs doing (remote login, FTP and rsync) all through SSH. For additional security, I also set SSH to a non-standard port.

Wondering what the pro’s do, I had a chat with an IT expert. He said that the only real way to do offsite backups is with tape. I can see the point; if the computer filesystem gets corrupted, or data deleted, then that missing data can carry through to the local, then offsite backup. The primary aim of my backup system is disaster recovery; coming back from total data loss. Using Time Machine on the backup drive covers against individual file loss, but at the moment there’s no way to recover against both issues.

So for the future I might add a tape system in with the network drive, to have better timed data recovery. But at the moment, I’m pretty happy with how the system is set up. For reference, here’s the (rather unwieldly) command to back up one drive to the other:

rsync -aviPh --progress --delete-after -e 'ssh -p 2345' --rsync-path=/mnt/Drobo-FS/Shares/DroboApps/rsync/rsync /mnt/Drobo-FS/Shares/Backup/ backup@ssh.example.com:/mnt/Drobo-FS/Shares/Drobo2/Backup/

Precision Flats

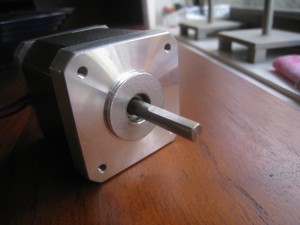
Several people have recommended that having flats on your motor shafts is a good idea. After having a couple of issues with my extruder motor gear slipping, I thought that it might be a good idea, too. The suggested way of doing it is to grip your motor shaft in a vice, and then file it down.

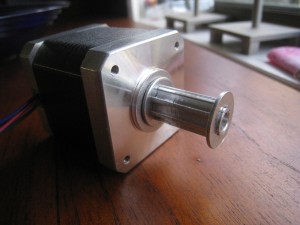
Fortunately, at my workplace, there’s a guy who’s a keen machinist. I passed the stepper motors along to him, and asked him if he could put some flats on the shafts. He thought it was a pretty easy job, and didn’t even ask for payment in beer. Here’s the results back a few days later.Stepper motor with precision flat

Now with some nice flats on the motor shafts, I thought that this would be a good time to fit the aluminium pulleys I had previously purchased. Unfortunately, the grub screws for these pulleys are far to long, they sit up into the tooth void when screwed down, causing the belt to skip over that tooth. To rectify this, I’d have to cut the screws down.

My first attempt was to cut the screw in half with a hacksaw. Unfortunately, this was a bit too much, and only left about 1mm of screw remaining. This should work in securing the pulley, but I’ll have to keep an eye on it.

For the second attempt, I just held the grub screw with a set of small pliers, and filed the end down to a shorter length. Although it was quite slow, it did the trick in getting the screw to just the right length.

Here’s the motor with the pulley attached. It looks great, and should really cut down on backlash. The belt fits in like glue.

Stepper motor with aluminium pulley

New Website

I’ve been doing a bit of work on a few websites lately.  One thing that I realised during my website work is that my hosting provider (GoDaddy) lets you host multiple sites, with multiple domain names, all under one hosting account. I hadn’t realised that before. I only thought that you could set up individual sites within folders, but not with domain names pointing to those folders. That allowed me to consolidate a bit of hosting all under one account. I kept the GoDaddy one. Even though it’s not the cheapest, it does provide you with a lot of control.

During the process, I investigated the WordPress blog system, and was pretty impressed by it. It’s got all the advantages of Blogger’s system, but it’s a lot more flexible, and being installed on your own host, it gives you total control of every aspect of the site. Plus, I like the aesthetics of the content-management system, and the innumerable themes which are available. I only found the Blogger themes to be ‘okay’ at best.

One thing I did was move my church’s website (coalcitycc.com.au) across to wordpress. This makes for much easier posting of the weekly sermons. Previous to that, the church’s website was just created in Apple’s iweb. Adding a new sermon each week involved a fair amount of messing around, and re-uploading the whole ‘sermon’ directory to the server.

Having a full content-management system with user control will also mean that I can create pages that other people can edit, without messing up the whole site. Ie, the youth leader can safely and securely edit the ‘youth’ page. This should allow for a much more dynamic website, as the individual group leaders can control and edit their own pages.

Since the church website was up and running nicely, I thought that I should think about moving this blog across. After thinking about it for a bit, I realised that there was no good reason to stay on blogger. I set up WordPress and imported across all my old posts. The biggest hassle was changing the DNS entries.

The main downside is that I’ve lost the comments that were already in Blogger’s system. Despite the import plug-in saying that it was able to import comments, it turned out not to be the case.

Of course, the other downside is that I need to do my own backups, but that’s not too onerous.

Meltdown

Total disaster. I updated the SFact with some new settings that I had high hopes for, that I thought would take the print quality to the next level.

I turned on the hot end. After a few minutes I saw that some filament was leaking out of the hot end. Strange. Then I saw this:

The PEEK block has melted into the nozzle. PEEK’s meant to have a melting point well over 265 degrees C.

The only cause for this that I can think of is that the thermistor wasn’t quite attached to the heater-block correctly. This would then have generated an incorrect temperature reading, causing the electronics to over-drive the hot-end past the melting point of the PEEK.

Unfortunately, the printer’s going to be out of action until I can get some parts in to rebuild the Arcol hot-end. While I’m at it, I should make a list of ‘critical spares’ and consumables that I should have on hand for the printer.

Reprap Shot Glass, Second Attempt

After getting the thermistor working again, I tried printing out the rep-rap shot glass, with the new skeinforge settings. It turned out excellently.

Much, much better than the first attempt. There’s still a few problems that need sorting out. In the picture below, you can see some ‘sagging’ that occured on the right-hand side.

The ‘solid’ infill isn’t coming in as completely solid. Still needs some work here.

The base, however, looks nearly perfect. You can clearly see the join between the two pieces of kapton tape.

A huge improvement. I’m really happy with the printer now. I suspect that I could start to print out parts for the reprap. While they wouldn’t look the best, they’d have sufficient accuracy and strength to do the job.

Bases, and Filament Retraction

Since my last printings have worked fairly well, I thought that I’d try and get the base working perfectly as my next goal. So, for today’s prints, I thought I’d do some experiments with the printbed and base. I tried to use the Pyrex base both with and without the Kapton tape, and at different temperatures for both the filament and heatbed.

Using the Pyrex base without Kapton was a total failure. The filament did not stick at all, under any conditions. With the Kapton on, I tried using the heatbed at temperatures from 110 to 130, and the extrusion from 220 to 235 degrees Celsius.

I also experimented a bit with the height of the tip above the base, varying it from about 0.1 to 0.4mm. I had a few troubles with this step, as the printer wouldn’t always pick up the activation of the microswitch, and keep driving the tip into the base. Having a closer look, it seemed like the switch was occasionally getting caught up on the Z-mount, without actually activating.

I tried for a little while moving the microswitch to the top of the printer, but there’s something wrong with the Sprinter firmware. Once the microswitch was in place, with the appropriate firmware settings, the Z-axis would only travel upwards, not downwards at all. After a few attempts at this, I gave up, and returned the microswitch to the bottom. This time, however, I moved it to the right-hand-side of the machine, where it seems to get a cleaner activation, and doesn’t get caught on the Z-mounts, like it was doing on the left.

The best results obtained was when I used the Kapton tape, had the tip 0.4mm from the bed (measured with feeler gauge), and had the tip at 230 degrees. For the base, I start out with it set on 130 degrees (so that the surface was measuring 120 +), then turn it down to 110 degrees as soon as the print started.There’s not many pictures to show here, as the prints would generally fail almost instantly, or I’d stop them after the first couple of layers.

Once I had the base settings fairly well sorted, I thought then that I’d print a different minimug. This one is slightly larger, and prints vertically, instead of horizontally. I thought that with the new base, and the vertical printing it’d turn out better than the previous minimug.

Not the case, unfortunately, as you can see from the above photos. Watching it closely, it looked like the retraction wasn’t working properly. It’d retract the filament when doing a move, then take a fair while (at least 2-3cm of travel before the filament would start coming out again.The base, however, turned out quite nicely.

To fix this problem, I would have to go into SFact, and change the retraction distance. Since I didn’t know what would work, I set the value to zero, so I could work upwards from there. Since I was also fiddling with the SF settings, I thought that I’d speed up the printer to the default speed. I’d been operating with it on 1/3rd speed, so I thought that I’d fix that up, see how it went. I thought I’d also try out a different object, the thin-walled calibration object.

The first couple of tests of this object turned out dreadful, until I adjusted the retraction down to zero. The settings improved things, but I there’s still room for more improvement. I went back into SFact and make some more changes to the settings. This time, I slowed down the speed for the first layer, and bumped up the filament extrusion ratio.

Just when I was ready to try out my new extrusion and retraction settings, I had a problem with the thermistor. The electronics was no longer reading a value from it. I’ve either blown a thermistor (which seems unlikely), or I’ve got a bad connection. Most likely the latter, but I thought I’d leave that for another day.