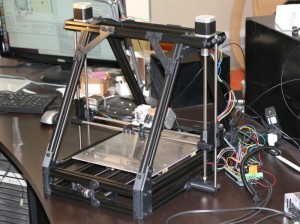
Look at the latest build that my wife and I have put together!
Author Archives: David
Second Meltdown
I’ve been having a bit of trouble with printing recently. The filament seems to have trouble feeding through the extruder, sometimes skipping a layer until I noticed it, and gave it a bit of a push through. The hobbed bolt seems to be chewing up the filament a bit, though that’s to be expected if it gets stuck.
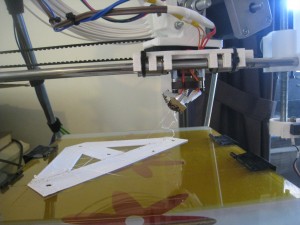
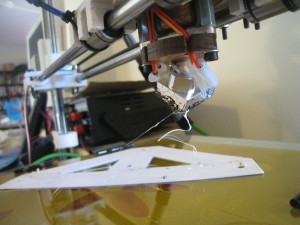
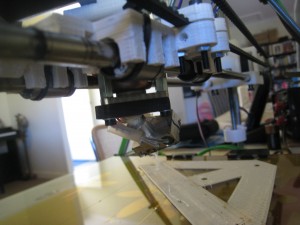
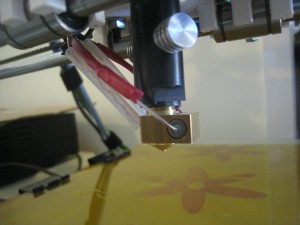
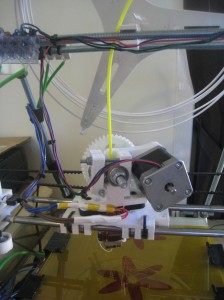
I tried various ways of fixing it, including increasing the printing temperature by a few degrees. The methods only seemed to have some slight success. Then, while I was printing out another foot for my ‘Aluminium Mendel’, the hot-end experienced a meltdown. I first noticed that the tip was dragging in the plastic, then I was that the angle of the hot-end was completely wrong. This is what it looked like:
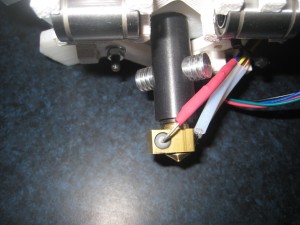
I killed the power, then pulled out the remaining filament before it could cool down, to try and minimise the amount of plastic stuck in the end. Having a look, the PEEK block was obviously gone. The only question was how many other parts were trashed with it. When my Arcol hot-end melted down, it took about six parts out with it at the same time. Once the hot-end cooled down, I disassembled it, to try and see how many parts were trashed. Fortunately, it turned out to be only two parts: The PEEK block and the nozzle.
I had a quick look at lulzbot.com, and fortunately, they have spare parts for the Budasnozzle. I was able to order the parts, and a few extra bits for my new printer. I also bought a new hot-end from one of the Aussie Forum members.
While I was waiting for the new hot-end, and the parts for my old hot-end to arrive, I thought I’d get the printer running again using a spare hot end which I’d previously bought from hot-ends.com after my first meltdown., so I set about trying to fit the new hot-end to the printer.
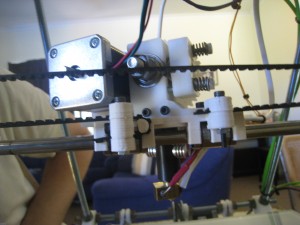
Naturally enough, the mount that the new hot-end had (ring mount) wasn’t compatible with my current extruder. My extruder was set up for the Arcol hot-end, and was compatible with the Budasnozzle, due to its mounting frame which ties in with the extruder mounting points. Similarly, the new hot-end I’d order wasn’t going to be compatible either, as it uses a third type of mount. Making a mental note to print up a new Wade’s Extruder with mounts for ALL my extruders, I had a rummage through my parts box. Fortunately, the original (Greg’s) extruder that I had was compatible with the ring-mount.
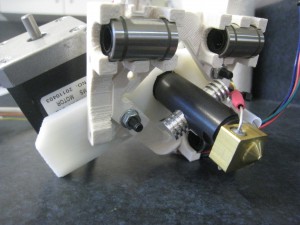
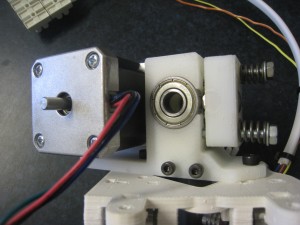
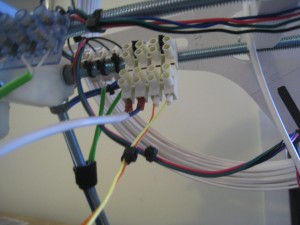
I also took the opportunity to add in a quick-release connector block for the hot-end. This will make it easier to do extruder change-overs.
Once the new hot-end was set up in the extruder, I tried to do some printing. Simple tests worked well, but when I tried to do a print, the filament wouldn’t completely feed through. The extruder would take a large bite out of the filament, and not feed it through.
The hot-end is working beautifully, so it seems like the likely culprit at this point in time is the hobbed bolt. It must have worn a bit, and the teeth no longer grip the filament enough. I suspect that it’s also to do with the retraction acceleration. It seems like the hobbed bolt ‘loses its grip’ during the retraction phases, which explains why the printer passed the easy printing tests with no problems – there was no retraction. Perhaps, by slowing down the retraction speed and acceleration, it will make it easier for the bolt to maintain its grip on the filament.
Hadron Ord Bot at Inventables
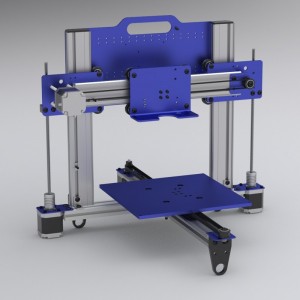
I received an email from the Makerslide store yesterday. They’re taking some pre-orders for the Hadron Ord Bot! I placed my order within 10 minutes of getting the email.
I completely love the design of this printer. The Makerslide makes the printer very clean and simple, but not fragile, like the some of the recent printers.
US$419 for the frame and motors. Fairly good value when compared to a Mendel. I just needs an extruder, hot-end and electronics. Since there will be ‘some assembly required’, I wouldn’t recommend it to beginners, but if you’re on your second printer, or have someone experienced to help you, then grab one now!
https://www.inventables.com/technologies/ord-bot-hadron-3d-printer-mechanical-platform
Current Settings
I had this comment a while back on one of my older posts:
| Hi, your prints are really nice. I am trying to get that with a Prusa Mendel but it is impossible. Could you help me with Skeinforge settings? |
I don’t use much in the way of settings these days. I use SFact on pretty much its default settings. The only changes I make are to the layer height (0.33mm), and the number of extra shells (0 to 1, depending on the print). Even the retraction is now kept on the default settings.
I keep speed very low for the first layer, 15mm/s for the perimeter, 20mm/s for infill. This ensures excellent adhesion with the heated bed, at 220 degrees. After the first layer, I turn the temp down to 197 degrees, and set the speed to 30mm/s for perimeter, and 60mm/s for infill.
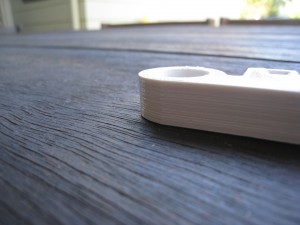
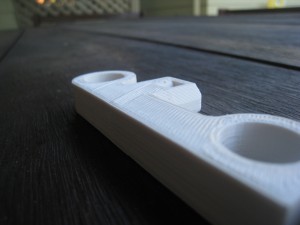
When I was complaining about the print quality of the Prusa in a recent post, I didn’t really mean it. Look at these photos.
Fantastic. X, Y and Z axes are all spot-on with their precision. But I’d like to do better still, particularly in getting rid of ‘dribble’ from the hot end.
Coloured Filament
During the week, Jeremy from Lybina posted on the Australian Reprap forums that they’re now making some coloured filament. This is great news for Australia reprapers. We’ve been well-supported with very-high quality white filament from Lybina, but they haven’t had any colours available.
Even better, they were giving away some free samples. I came to the post over a day after it’d been posted, so I thought that I’d miss out for sure. I gave Lybina a call anyway, and they said that I was the first! This was pretty surprising, given that it’s free high-quality filament. I think that most people in Australia print with PLA, but it was still surprising. The only catch is that you have to pay for the postage, and report back to Lybina how the filament printed.
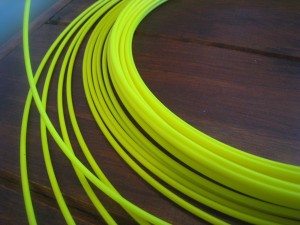
They were giving away samples of yellow, green and purple filament. I put my hand up for some yellow filament. All my printing so far has been with Lybina’s white filament, so I was pretty confident that they’re product would be good. The filament arrived by courier yesterday afternoon. Pulling it out of the bag, it looked great. Solid yellow colour.
A quick check with the micrometer showed that Lybina’s manufacturing was as good as always. First sample was 3.00mm on the long axis, 2.90mm on the short. A check on the other side of the roll had 2.95mm and 2.90mm.
For my first print, I thought that I would print out one of the ‘screwable jewellery boxes’ which I have done before. Being quite delicate, and requiring precision, I thought that they would be a good test to see how the filament performed.
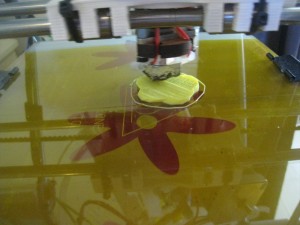
When I was talking to Jeremy on the phone, he mentioned that the colours are only stable up to 220 degrees C. Since I usually do my first layer at 230 degrees C, this might have caused a problem. So I turned down the hot-end to 219 for the first layer. I made sure that the heated-bed was up to all the way up to 110 degrees (rather than my usual ‘anywhere between 100 and 110 is fine’) before I started printing. Adhesion was great, with no issues at all. For the remainder of the layers, I dropped back down to my usual 197 degrees.
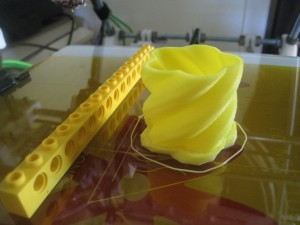
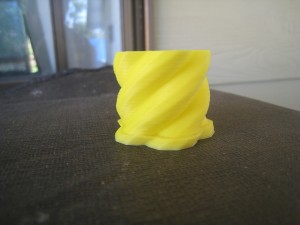
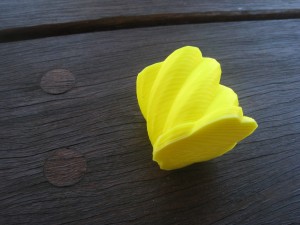
As you can see from the photos, the filament printed just fine. However, the colour was quite pallid. I was expecting much more of a ‘lego technic beam’ colour, rather than ‘pale lemon’, which was a bit disappointing. It looks like they need to use more dye.
Overall, I’d give the plastic a 10/10, but the colour a 6/10. A big thanks to Lybina for providing the free sample!
New Printer
For a while, I’ve been thinking about building a new printer. I’m pretty happy with how the Prusa has worked out, but I’m becoming keenly aware of its limitations.
One of the main limitations that I see with the Prusa is that it looks like it’s made by amateurs. It doesn’t have that ‘Polished’ look that makes it look like it’s being designed by an industrial designer. That makes it hard to keep inside the house.
The other limitation is the print quality. Whilst you can get excellent prints with the Prusa, I think I’m definitely at the point of diminishing returns, where I’ll have to put in exponential levels of effort to get small improvements. A superior printer design should get to a higher level of printing quality with less effort.
I haven’t quite decided what printer I’m going to build yet. For a while, I was settled on building a MendelMax printer. The problem that I see with the MendelMax is that it’s inefficient with its use of the aluminium extrusions. While replicating the Prusa frame has its advantages, I think that its structural elements are overkill, and still don’t solve the Mendel’s issue of having little support along the X-axis.
But then I saw two new printers, namely the Quantum Ord, and the ‘Aluminum Mendel’. The Ord bot looks fantastic, looks also good enough to be a commercially-made device. It’s very minimalist, and uses the Makerslide as a structural element, not just as a sliding surface.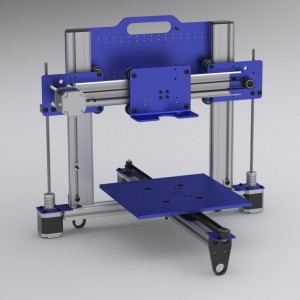
I love the design of the Quantum Ord, but MakerSlide at the moment is highly unobtainable. I’ve been signed up for the Makerslide shop for a few weeks, but every time he releases a batch (at about 12-1am in the morning here), it’s sold out by the time I wake up and check my emails. To make matters worse, I didn’t even receive the email when Barton announced he was selling some Ord bot kits, so I missed out on them as well. I’m also considering a merge-build. Use Makerslide for the axes movement on a MendelMax. However, this seems to be extremely wasteful usage of the Makerslide, since it’s strong enough to be used as a structural element by itself.
Since the Makerslide is so hard to obtain, I’m thinking of going for the ‘Aluminum Mendel’. I really like this design. It’s much simpler than any other design, with the exception of a Printrbot, but uses Aluminium extrusions for strength and rigidity. One feature that I particularly like is that all the components of the printer are inside the frame. Nothing hangs out, not even electronics or the power supply. Extremely clean. One thing that annoys me however is the ‘Mendel’ tag. It’s not a Mendel in any way, in my opinion. Mendel printers should have the ‘raised A-frame’ design. It does have a suspended X-axis, like the Mendel, but that’s about the only similarity.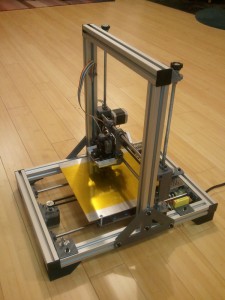
I’m still deciding at the moment. I’ll post again when I’ve made my choice.
Visual Illusion
In Julian’s blog, he talked about one of his recent designs – a piece that was designed to answer a challenge on the Thingiverse blog.
He noted that he hadn’t printed it out yet, so I thought that I’d have a go this afternoon, see just how well it turned out. I downloaded the piece from Thingiverse, and printed it out.
The printing went quite well:
Trying to take a decent video showing the illusion was by far the hardest part of this mini-project. This was my best attempt, which I think did the trick. Unfortunately, these balls were a bit big for the job.
Observation
You know your grass is too long when your kids go out the back to play ‘Tigers in the Grass’.
If anybody needs me, I’ll be out mowing the lawn.
Recent Printing
I haven’t been doing much printing lately, the usual hassles of life catching up with me.
I’ve printed up a few more of the earbud holders over the last few weeks, for people who are jealous of the ones that I gave out during Christmas.
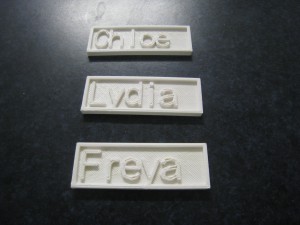
A couple of weeks ago, I spotted this page over on thingiverse, which generates some nameplates. I thought that these looked like a lot of fun, and an easy way to print name-tags for the kids’ bags and stuff.
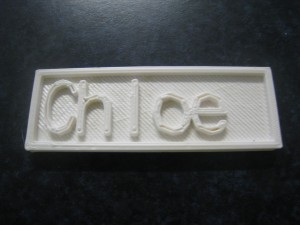 I printed out a few of them one evening while my wife was having a craft night with her friends. They loved them, so I ended up printing out lots of them for their kids as well.
 Last week, I went through and updated the software toolchain – SFact, Pronterface and Marlin. It never fails to amaze me just how much improvement comes through in the software, over the space of two months.
The only other thing of note that I’ve printed out lately is some bracelets. Slightly strange story behind these – when I was speaking on the phone with my Mum a few weeks ago, she said that she had a dream that I’d printed her out a bracelet. So, to make the prophecy self-fulfilling, I found a design on Thingiverse and printed a few out for my Mum and daughters. Turned out very nicely.
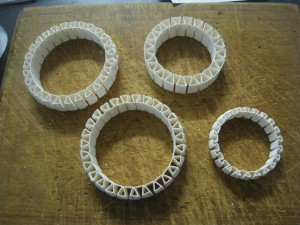 I adjusted the size of the first couple of larger ones by playing with the ‘scale’ setting in SFact, but this didn’t work very well with the smaller bracelets. So I downloaded the OpenScad file, and modified the variables in that. That worked really well to generate the smaller bracelets.
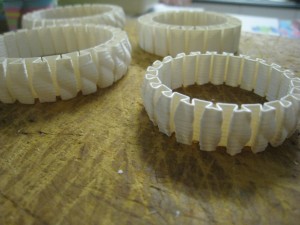 The printer’s working really well these days, completely hands-off. I just hit ‘print’, then walk away. The printer even shuts itself down at the end of the print, and always produces nice results.
Proposal: Part Per Month Project
This is a copy of the post I made to the Australian Reprap forums.
The Part Per Month Project
Background
Back when Reprap was young, it was a principle of the project that all printers would print out and give away one set of parts, to help the project grow. This idea has largely fallen into disuse over the last couple of years, but the idea is a good one. However, printing out a full set of parts is a fairly daunting task, and requires a fair amount of printing time and material.
In addition, there are numerous organisations and individuals out there who could benefit from receiving the ‘seed parts’ for a 3D printer.
This proposal is an idea that I’ve had for a while. Now I’ve got my printer up and running to a decent level of quality that I can make parts that I would be willing for someone else to use, I thought I’d put it to the group.
Proposal
As the name suggests, this project will seek to enlist members to print out one part per month. These parts will be sent to recipients who can benefit and use these parts to build their own 3D printer.
The printer will be divided up into the following parts:
- Frame Vertex w/ Foot No. 1
- Frame Vertex w/ Foot No. 2
- Frame Vertex w/ Foot No. 3
- Frame Vertex w/ Foot No. 4
- Frame Upper Vertex No. 1
- Frame Upper Vertex No. 2
- Z-Motor Mount 1
- Z-Motor Mount 2
- X-End Idler
- X-End Motor
- X-Carriage
- Extruder
- Extruder Gears
- Y-Motor mount and X & Y-Motor pulleys
- Z-Axis couplings x 2 plus Endstop holders x 3
- Bushings x 12
- Bar clamp x 8
- Belt-clamp x 4 plus rod-clamp x 2
As can be seen, this will require eighteen people in the project. At the start of each month, a recipient will be selected from a group-agreed list. The members of that project will then print out their pieces and mail them off individually to the recipient. This keeps the administration of the project to a minimum, but does require the project members to keep their word and mail off their parts.
Just about all of these parts can be printed in an hour or less, and only use a few grams of plastic, so it only represents a modest investment. Most likely, the postage for each part will cost you more than the plastic.
Many of us aren’t part designers, or wiki writers. We don’t contribute much back to the Reprap community other than through helping people in these forums. This project will be a way for us to give back to the Reprap community, using the very tool that community helped us to create.
Call for Members and Recipients
If you’re interested in joining this project, please respond to this thread, stating which part you’d like to print. Personally, I’d like to print part ‘7’.
In addition, I’m also seeking to create a list of recipients. If you know of worthwhile recipients, post them up and we can discuss and add them to the list. Suggested recipients: Hackerspaces, schools, uni labs, maybe even as prizes for STEM competitions. Since this is an Australian forum, I’d suggest keeping it to Australian recipients for now.
FAQs
Here’s some questions I’ve anticipated. I’ll add more to the list as they get asked.
Q: I only print in PLA / ABS! How will mixed parts work?
A: I can’t see any problem with having mixed printers. My only suggestion is that people who only print in PLA sign up for the ‘PLA recommended’ parts first, ie bushings, and ABS-only printers sign up for the ‘hot’-pieces first (X-Carriage, Extruder).
Q: I don’t want to print out any parts, but I’d like to help in other ways!
A: If you’d like to help, let me know. There are plenty of other ways you could assist. For example you may wish to donate a couple of metres of ‘starter’ filament, or machine up a hobbed bolt, or a couple of bits for the hot-end. Make a suggestion!
Q: Which set of pieces should we print? There are so many variations, ie, printer feet, linear bearings, etc.
A: To start with, we’ll only print up the ‘Prusa standard’ parts list. I’d suggest that we fully embrace the ‘iteration 2’ Prusa. To ease confusion, we’ll probably create a github repository, with only the PPMP parts in it.
But I don’t want to be too rigid. If someone’s willing to donate the linear bearings, then we may go for LB pieces. Likewise, if someone is willing to print up the extruder and the gears, then that person can choose which one they print. Depending on the number of people, and their willingness, we may also choose some pieces such as the ‘combined frame axis and Z-Motor Mount’ parts.
Q: What if we don’t get eighteen people involved?
A: If we only get nine people, then I’d suggest that we keep the ‘one part per month’, just have different parts on alternate months, and thus the project will donate one full set every two months.
Q: Sounds great! When do we start?
A: I think it’d be best if we target the start of April as the starting date. This will give everyone enough time to sign up to the project, practice ‘their’ pieces, and be ready to go in the start of April.
