While my Prusa is printing fairly well, there’s still a lot of room for improvement. My calibration methodology so far has involved just fixing the glaring problems, rather than going through a systematic calibration process and optimising the printer’s performance at every step.
The top two tasks on my ‘to do’ list are calibration related, so it makes sense to tackle them all in one go. Seeing the success that Julian has had with his calibrations has inspired me to sit down and go through the calibration profile described in the wiki.
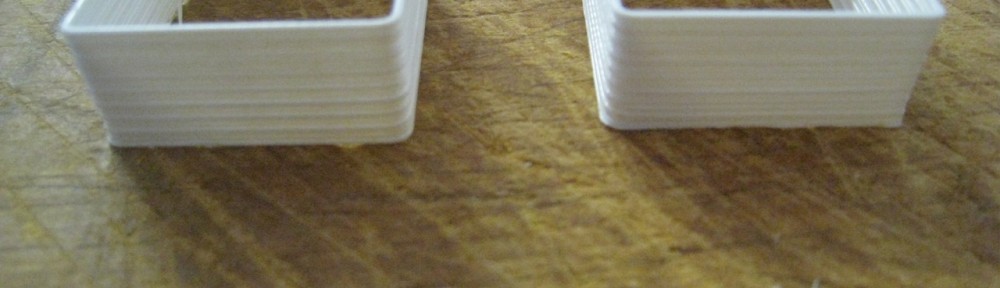
First off: Thin-walled cube. This one is used to test the layer thickness. As per the calibration procedure, I started off with 0.4mm, working my way down in 0.01mm increments – all at 30mm/s speed. 🙂
 As you can see from the photos, they all turned out great, with no issues at all of the extruder tip plowing into the previously deposited layer. SFact is obviously doing a really good job in controlling the extrusion for all these different heights. As the layer thickness decreases, the fineness of the layers becomes extremely apparent.
 The one on the left is 0.4mm layer thickness, and the one on the right is 0.31mm.
Stage two was looking at infill.
 The first one I ran, I only had the infill solidity at 0.35. It turned out fine, perfectly flat. The second one I turned up the infill solidity to where it was meant to be: 1.0. In this one, there was a noticeable convexity to the top of the print. It was only minor, but quite noticeable.
However, I couldn’t find the setting in SFact that ‘s meant to fix the issue – ‘Infill width over thickness’. This must be one of the settings that been taken out with the move from Skeinforge to SFact. Maybe the best way to adjust this these days is by changing the ‘Filament Packing Density’ – I’ll have to check. Since there wasn’t anything more I could do here, I moved onto a third test – Oozing.
Oozing has been the biggest issue with my printer since I started printing. There’s two main issues that I have. The first is at the ‘uplift corner’. I always get a bulge at the corner where the printer stops to lift up the layer. The lifting up process causes the print to pause for a second. The ‘dribble’ from the nozzle at that point always creates a slight bulge.
The second issue is a more typical ooze issue – ‘fly aways’ at the start and end of exposed ‘towers’. This can be seen very clearly in some of my earlier prints – seen here. These problems aren’t too bad. The results can be cleaned up with a knife fairly easily, but better not to have the problem in the first place.
 Unfortunately, I wasn’t able to make any real headway today into this problem. SFact has two main ooze-related settings – ‘Oozerate’ and ‘Filament Retraction Speed’. I fiddled with these settings, as can be seen the above photo, but without any real improvement.
As an additional step, I went and downloaded the ‘daily branch’ version of SFact. This has a lot more ooze and retraction-related settings. I tried a couple of test prints, but again, had no significant success.
I’ll keep trying with some additional settings, but I think I’ll have to go to the forums’ and ask for some help there, get the expert’s opinion.