A few days ago ‘Schulz’ made a post on the Australian forums. He was looking to buy a modified Wade’s Extruder that would fit on the Arcol hot-end. Those who’ve read through this blog think that this story sounds quite familiar.
So, taking pity on a fellow sufferer, I offered to print him up a Greg’s accessible extruder for him for free.
First thing up was to find the STL files. Looking at the parts posted on Thingiverse, it looked like the STL files posted there weren’t pre-compiled for the Arcol hotend mount.
I get around that limitation, I downloaded the OpenScad file also published along with it. Opening up the file it looked good, but wouldn’t compile without a bunch of warnings. It was missing some configuration files that were meant to go along with it.
At first I tried having a look at Thingiverse, to see if the missing configuration files could be found there. Unfortunately not. I then had a revelation. I went to Github, and did a search for Greg Frost. There he had his fork of the Prusa files there. Looking in the list, I saw a newer version of the extruder file, and all the configuration files that it was looking for.
Once I had all the right configuration files, the extruder compiled just fine. I then added in the options for the groovemount, and the Arcol hot-end. For some reason, the groovemount option didn’t compile in correctly, but the Arcol mount did, which is all that I was looking for.
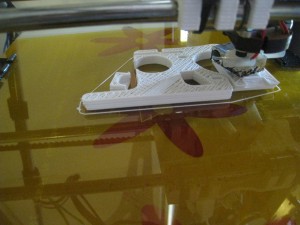
I then exported the file to an STL, and loaded it up in Pronterface. The estimation came up as three hours, fifty minutes. Three hours later, the print finished.
 What struck me during the print was all the solid layers. I only used my standard 35% fill, but it printed with a lot more solid layers. It must be a feature of Greg’s design to include lots of solid reinforcing layers.
In all, I was pretty happy with the print. It doesn’t look quite as good as Greg’s extruder that’s on my machine, but it’s relatively close. Interestingly, mine required less cleanup than Greg’s did, but his surface finish is superior.
Printing out the object gave me a great sense of admiration for Greg’s design. It’s by far the most complex print I’ve ever done. Whilst the snowflake’s were complex, they were only complex in a two-dimensional manner, and were just a extrusion of that two-dimensional shape. The extruder is a true 3-D shape of high complexity.
After I did the extruder, I went to do the gears. I didn’t want to print out the standard gears, so I found some STL files for some herringbone gears. The herringbone gears mesh together more tightly, so there’s less backlash from the extruder. Also, even though they are a more complex shape, I think that they’re more forgiving for poor printing.
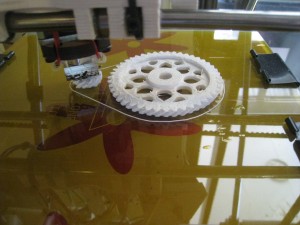
 The gears printed out fairly well. My main concern for the print was that the top of the small gear would get too mushy from too small a print area. To get around that, I put in some ‘orbit’ around the print. Unfortunately, I forgot how oozy my hot-end is. It meant that there was a lot of fine strings all around the print that needed to be cleaned up at the end.
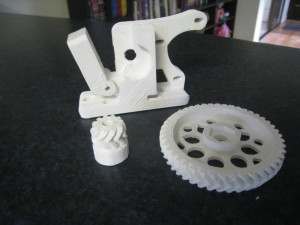
The teeth on the large gear printed fairly well. The teeth on the small gears not so well. They were a bit blobby, and needed some cleanup. They tidied up pretty well, and I think that they’ll work fine. They seemed to mesh together nicely.
The completed extruder pieces:
 All up, it was a very good test for my printer, one that I think it passed fairly well. Yesterday, I threw all the pieces in the mail. Hopefully, they’ll work great for Shulz and get him on the path to printing!
3 hours of printing? to print it in speed and feedrate FLOWRATE?
I typically use 30mm/s for my flowrate, with 0.33mm layers. I find that this gives me very good quality.
One of the things that slowed this print down was a lot of solid internal layers.